There’s something magical about walking through a garden and feeling the crunch of a perfectly laid path beneath your feet. Not only does a well-designed garden path add structure and functionality to an outdoor space, but it also enhances the natural beauty of your yard. In this video, you’ll see every stage of creating a durable, attractive concrete garden path—from raw ground to the finished masterpiece—all in one seamless presentation. Whether you’re a weekend DIY warrior or just here for the satisfying transformation, you’re in for a treat.
Let’s walk through each stage step by step.

Stage 1: Planning and Design
Before a single shovel touches the earth, it’s all about planning. This stage includes choosing the location, shape, and dimensions of the path. The homeowners wanted a winding path that flowed gently through the garden beds, connecting the patio to a small pond near the back of the yard. They measured the space carefully and marked it out using stakes and string.
In the video, you’ll see the outline take shape like a blueprint drawn directly onto the landscape. A chalk spray paint line follows the string, tracing the final path design.
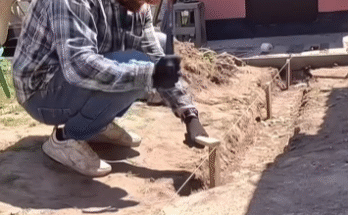
Stage 2: Excavation
Next comes the hard work—digging. The video shows a team removing the top layer of grass and soil to a depth of about 4 to 6 inches. This depth ensures the concrete has a stable base and won’t crack over time due to shifting soil or plant growth underneath.
A wheelbarrow, a spade, and a lot of sweat bring this vision to life. You can almost feel the physical effort behind each scoop of soil being carted away. This is where the transformation begins to feel real.
Stage 3: Building the Form
Once the trench for the path is dug, wooden forms are installed along the edges. These boards will hold the wet concrete in place and determine the final shape and height of the path. In the video, clamps and stakes are used to secure the boards tightly to avoid bulging.
This step is like setting the mold for a sculpture. Precision is key. You can watch the team double-check each section with a level to make sure everything is even. A well-leveled form means a smoother, safer walkway in the end.

Stage 4: Adding the Base Layer
Now it’s time to add a layer of crushed gravel or compacted sand to serve as a stable base for the concrete. This step is often overlooked by beginners, but it’s crucial for drainage and long-term durability.
The video shows a vibratory plate compactor going over the gravel until it’s tightly packed. No shortcuts here—this is the foundation that ensures the path doesn’t crack or sink later on.
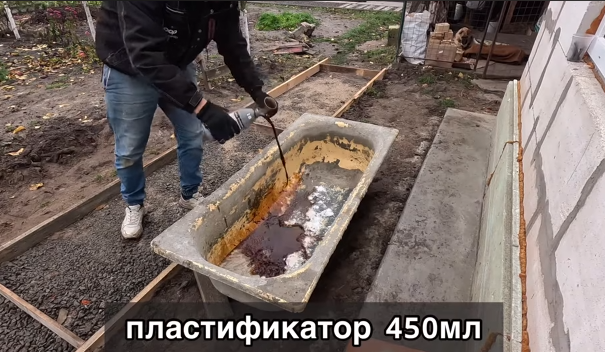
Stage 5: Mixing and Pouring the Concrete
Here comes the most satisfying part: the concrete pour. Bags of ready-mix concrete are blended in a mixer with water until smooth and consistent. Then the team pours it directly into the form, section by section.
As you watch the gray mixture flow like thick cake batter, it’s easy to see why this step is often featured in slow-motion clips. It’s incredibly soothing to watch the concrete fill the form, spreading into every corner and edge.
Stage 6: Screeding and Smoothing
Right after pouring, the concrete is screeded—leveled off using a long board or tool that slides across the top of the form. This ensures the surface is flat and even. Then it’s time for troweling, which gives the concrete a smooth or textured finish, depending on the desired look.
In the video, the team uses hand trowels for a slightly rough finish, giving the path a natural, stone-like texture that blends beautifully with the garden environment.
Stage 7: Adding Patterns or Edging (Optional)
To elevate the path’s appearance, a stamped concrete pattern is added using rubber mats pressed into the semi-set concrete. These mats mimic the appearance of slate, cobblestone, or brick.
The homeowners chose a subtle stone pattern and a neutral color tint to match the tones of their garden. Watching the pattern emerge as each stamp is carefully placed and pressed is immensely satisfying.
If you’re watching the video, you’ll probably pause or rewind this part—it’s that hypnotic.
Stage 8: Curing the Concrete
Once the design is set, the path must cure—essentially dry and harden—over the next several days. In the video, the team covers the path with plastic sheets to protect it from rain and sun, keeping the surface moist to prevent cracking.
This may seem like the most uneventful stage, but it’s one of the most critical. Concrete gains strength slowly, and proper curing ensures it lasts for decades without damage.
Stage 9: Removing the Forms and Cleaning Up
After a couple of days, the forms are gently removed. The video shows this process in fast-forward, revealing the crisp edges and clean lines of the finished path. Any minor rough spots are sanded down, and the edges are brushed to soften the transition into the surrounding soil or mulch.
All the tools and debris are cleared away, leaving the newly formed path to shine. The result is striking.

Stage 10: Landscaping Around the Path
With the concrete cured and clean, it’s time for the final touch—landscaping. The video ends with scenes of mulch being added along the sides of the path, new flowers being planted, and solar lights installed for a warm evening glow.
The winding path now weaves through the garden like a ribbon of stone, guiding the eye and the feet toward the water feature. It’s more than just a walkway; it’s a statement of design, effort, and attention to detail.
Final Thoughts
Watching a garden path made of concrete come to life, stage by stage, is both educational and deeply satisfying. From the first sketch to the final flower, this video captures every moment of transformation in crisp, clear footage.
If you’ve ever considered tackling a similar project in your own backyard, this video is the perfect inspiration. And even if you’re not ready to pour concrete anytime soon, it’s hard not to enjoy the process—especially when you can watch it all unfold in just a few minutes.
So sit back, hit play, and enjoy the journey from dirt to design. The garden path awaits.