Renovating a room is an exciting journey. Whether it’s a bedroom, living room, or home office, a fresh design can breathe new life into your space. But before you start tearing down walls or buying new furniture, preparation is key. Good planning helps avoid unnecessary costs, delays, and stress. In this article, we’ll walk you through the essential steps of room renovation preparation—from idea to action—so that your project goes smoothly from start to finish.
Step 1: Define Your Purpose
Before touching anything, clearly define the purpose of the room. Ask yourself: What will this room be used for? Is it going to be a relaxing space like a bedroom, a practical space like a kitchen, or a productive one like an office? Your answer will guide all other decisions—style, layout, lighting, and furniture choices.
For example, if you’re turning a guest room into a home office, your focus will be on functionality, storage, lighting, and ergonomics. But if you’re transforming a kid’s room, safety, durability, and playful colors become top priorities.
Step 2: Gather Inspiration
After defining the purpose, it’s time to gather ideas. Look for inspiration on Pinterest, Instagram, home improvement blogs, or magazines. Create a mood board with colors, materials, textures, and design elements you like. This visual reference will help you communicate your ideas to contractors or designers—and help you stay focused on your theme.
Don’t just look at luxury designs; find inspiration that matches your budget and lifestyle. Remember, renovation isn’t about copying—it’s about customizing a space that works for you.
Step 3: Make a Budget
This is one of the most important parts of your preparation. Decide how much you’re willing to spend, and break it down into categories:
- Labor (if you’re hiring contractors)
- Materials (paint, tiles, wood, hardware, etc.)
- Furniture and decor
- Tools and rentals
- Contingency fund (always keep 10–20% extra for unexpected costs)
Creating a realistic budget keeps you grounded and helps prioritize what matters most. You might not afford marble countertops, but you can still achieve a luxurious look with alternatives like quartz or high-quality laminate.
Step 4: Assess the Room
Now, take a good look at the room you’re renovating. Measure everything—walls, floors, ceiling height, window size, and doors. Sketch out a simple floor plan to better understand how everything fits together. Note down any existing damage, poor lighting, or awkward layouts that need fixing.
Also, check the condition of plumbing and electrical wiring if you plan to make changes to those systems. You may need a professional inspection to ensure your home meets safety codes.
Step 5: Declutter and Clean
Before the actual renovation starts, clear out the space completely. Remove furniture, take down pictures, roll up rugs, and protect or pack up anything fragile. This makes it easier to assess the room, do repairs, and start work safely.
A thorough cleaning—vacuuming, dusting, and wiping down surfaces—also helps you spot hidden issues like mold, water damage, or wall cracks that might have been overlooked.
Step 6: Create a Timeline
Time is money, especially during a renovation. Whether you’re doing it yourself or hiring professionals, it’s important to have a schedule. Set a realistic timeline for each phase:
- Demolition or removal
- Structural changes (walls, ceiling, etc.)
- Electrical and plumbing work
- Painting and finishing
- Flooring installation
- Furniture and decor setup
Try to account for delays due to weather, shipping, or contractor availability. A room renovation may take a few days or several weeks depending on the scope, so planning ahead helps minimize disruption.
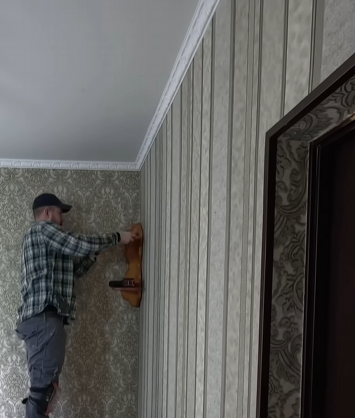
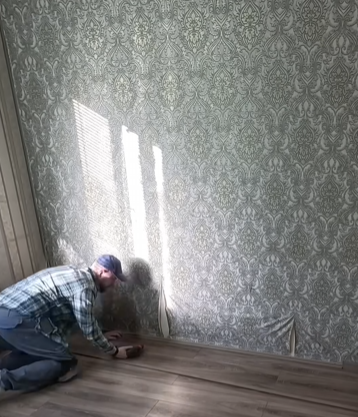
Step 7: Choose the Right Materials
Quality materials make a huge difference in both appearance and durability. Research different brands, compare prices, and read reviews. Think long-term. For example, choosing a washable paint for kids’ rooms, moisture-resistant flooring for bathrooms, or soundproof insulation for home offices can be smart decisions.
Also, make sure the materials match the style you want. If you’re going for a rustic look, wood and natural textures work well. For a modern design, opt for glass, metal, and neutral tones.
Step 8: Hire Help (If Needed)
You don’t have to do everything yourself. Hiring professionals—contractors, electricians, painters, or interior designers—can save time and reduce mistakes. When hiring help, always check references, ask for quotes, and make sure they’re licensed and insured.
Even if you’re doing most of it yourself, some tasks like rewiring or plumbing are better left to pros for safety and legal reasons.
Step 9: Gather Tools and Supplies
If you’re going the DIY route, make sure you have the necessary tools:
- Measuring tape and level
- Screwdrivers, hammers, drills
- Safety gear (gloves, goggles, masks)
- Ladders or step stools
- Paint supplies (brushes, rollers, trays)
Double-check that everything works properly. Having all your tools ready before you start helps avoid interruptions during the renovation.
Step 10: Protect the Rest of Your Home
Renovations can be messy. Dust, paint fumes, and noise can spread to other rooms. To prevent this, use plastic sheets or zip walls to seal off the renovation area. Cover floors with drop cloths and use painter’s tape to protect trim and furniture.
If possible, plan to use a different room during the renovation, especially if it’s a bedroom or kitchen. And if you have kids or pets, make sure they’re safe and away from the work zone.
Final Thoughts: The Power of Preparation
Room renovation isn’t just about swinging hammers and slapping on paint—it’s a thoughtful process that begins long before the first nail is driven. Preparation is the secret weapon of a smooth renovation.
When you prepare properly, you reduce stress, stay on budget, make smarter design choices, and—most importantly—you enjoy the process. The result is not just a beautiful room, but a space that reflects your lifestyle, taste, and needs.
So take your time. Plan thoroughly. And soon, you’ll be stepping into the dream room you’ve been imagining all along.