At first glance, making wood slices might look simple. You find a log, fire up your chainsaw, and cut off a nice round disc. Easy, right? But anyone who’s actually tried it knows that slicing wood—especially for decorative or craft purposes—is a lot trickier than it appears. Sometimes you get beautiful flat “cookies” that look like they came out of a textbook. Other times, what you thought would be a perfect slice warps and curls like a potato chip—thus the nickname, “pringles.” If you’ve ever made wood slices, you’ve probably experienced both outcomes.
Let’s dig into why this happens, how to improve your results, and why making wood slices is as much an art as it is a science.
The Challenge Begins with the Tree
The first step in making good wood slices is choosing the right log. Not all wood is created equal. Hardwoods like oak, maple, and walnut tend to give better results than softwoods like pine or spruce. Hardwoods are denser and hold their shape better, reducing the chances of the slice warping.
But it’s not just about species—it’s also about the condition of the log. A freshly cut, or “green,” log is full of moisture. That moisture is one of the biggest reasons wood slices curl and crack. As the water evaporates, the outer parts of the wood dry faster than the center. This uneven drying creates internal stress, which can cause a once-flat cookie to curl, split, or cup.

Cookies vs. Pringles: What’s the Difference?
In woodworker lingo, a perfect wood slice is called a “cookie.” These are flat, round cuts that maintain their shape over time. They’re great for making table centerpieces, coasters, signs, or even clocks. A cookie should sit flat on the table and look just like the cross-section of a tree trunk—with visible growth rings and even coloration.
On the other hand, a “pringles” wood slice is one that curls or warps as it dries. Just like the famous potato chip, a pringles slice has a curved or cupped shape that’s hard to flatten. It might still be useful for some rustic art or garden décor, but it’s usually not ideal for furniture or precise projects.
You never really know what you’re going to get until the drying process is over. That unpredictability is part of the fun—and frustration—of working with wood slices.
The Right Way to Cut Wood Slices
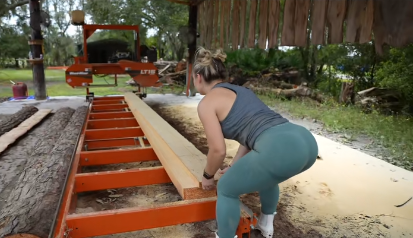
Let’s say you’ve got your log ready and your saw fueled up. The way you cut the wood can also affect how the slices turn out. A good chainsaw with a sharp chain is essential. Ideally, you want to cut as clean and straight as possible. If the log wobbles or shifts during the cut, you’ll end up with uneven thickness or jagged edges.
Some people use a chainsaw mill or jig to keep their cuts level. Others prefer using a band saw or miter saw if the log is small enough to handle. Either way, consistency is key. Each slice should be roughly the same thickness. Thinner slices (under 1 inch) tend to warp more, while thicker ones are more stable but take longer to dry.
Once the slices are cut, the real challenge begins—drying.
Drying: The Make-or-Break Moment
Drying is where most wood slices meet their doom. The transition from a green, water-filled disc to a dry, usable slab is what separates cookies from pringles. The moisture needs to leave the wood slowly and evenly.
There are several methods to dry wood slices:
- Air Drying: The most common and traditional method. Stack the slices with stickers (small spacers) between them to allow airflow on all sides. Store them in a dry, shaded area out of direct sunlight. This method can take weeks or even months, depending on the thickness of the slices and the humidity in your region.
- Kiln Drying: Faster and more efficient but requires a kiln. Some professional woodworkers invest in kilns or build their own from insulated boxes and dehumidifiers.
- Microwave Drying: This is for small slices only. You microwave the slice for short intervals, allowing it to cool between sessions. This method works surprisingly well for thin pieces but requires close attention to avoid burning the wood.
To prevent cracking and warping, some woodworkers seal the ends of the slices with wax or anchor seal. This slows down moisture loss from the ends, where cracking usually starts.

A Surprising Outcome
Even with the best preparation, you might still get a mix of results. One slice might dry beautifully, while the one right next to it turns into a wavy mess. That’s the unpredictable nature of wood.
Sometimes the very things we consider flaws—cracks, curls, or unusual grain patterns—become the most beautiful parts of the slice. A warped piece might not be great for a coaster, but it could be perfect for a rustic wall hanging or centerpiece.
And sometimes, those pringles-shaped slices can be flattened using a method called press drying—where the slices are clamped between two flat boards while drying. It doesn’t always work perfectly, but it can help tame some of the worst warps.
Lessons from the Sawmill
If you visit a sawmill or watch a professional woodworker make slices, you’ll quickly realize just how much skill is involved. From choosing the right log to managing the drying process, it’s a craft that rewards patience and precision.
In fact, some artists and furniture makers go out of their way to work with imperfect slices. They fill cracks with resin, highlight warps with contrast stains, or incorporate odd shapes into one-of-a-kind designs. In that way, every piece of wood—cookie or pringle—has potential.

Have You Tried It?
If you’ve never made wood slices, you should try it. Start with a small log—something manageable. Cut a few slices, experiment with drying techniques, and see what you get. You’ll quickly learn to appreciate the challenges and rewards of working with natural materials.
And if you’re already a seasoned DIYer or woodworker, you probably have your own tricks and horror stories to share. Maybe you’ve tried drying slices in the oven (not recommended!) or had an entire batch crack down the middle after weeks of careful drying.
One thing’s for sure—whether you’re after perfect cookies or end up with pringles, making wood slices is a journey full of surprises.
Final Thoughts
Wood is alive, even after it’s been cut. It reacts to its environment, shifts with moisture, and holds hidden quirks that reveal themselves over time. That’s what makes working with wood slices so rewarding—and so humbling. No two slices are ever exactly alike.
So next time you admire a clean, polished wood cookie in someone’s living room or see a rustic centerpiece at a wedding, remember: it probably didn’t start out looking that perfect. There were sawdust-covered boots, a temperamental chainsaw, and maybe a few failed attempts along the way.
Cookies or pringles—it’s all part of the process.


