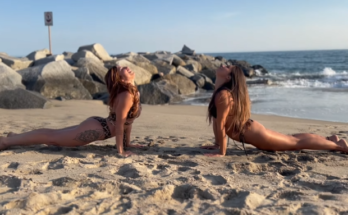
When it comes to unlocking flexibility, especially in your hips and inner thighs, few poses are as powerful—or as satisfying—as the Frog Pose. Known in yoga as Mandukasana, this deep hip-opening stretch works wonders for mobility, posture, and lower-body strength. It’s not just a stretch; it’s a challenge, a daily ritual that helps you reconnect with your body and feel grounded, balanced, and free.
If you’ve been sitting too long, feeling stiff in your hips, or dreaming of moving with ease like a dancer or yogi, this 3-minute Frog Pose Challenge is exactly what you need. So, grab a mat, breathe deeply, and let’s dive into this 4K-level flow for flexible legs, open hips, and an energized spirit. 🐸✨
1. The Power of Hip Flexibility
Before we start the challenge, it’s important to understand why hip flexibility matters. Our hips are the foundation of movement — they connect the upper and lower body, stabilize balance, and support nearly every motion we make.
Modern life, however, often tightens the hips. Hours of sitting, driving, or using screens can shorten the hip flexors and weaken the glutes. This leads to stiffness, poor posture, and sometimes lower back pain.
Frog Pose targets these tight muscles directly — especially the adductors (inner thighs), hip flexors, and groin. By practicing it daily, even for just three minutes, you gradually open these areas, increase blood flow, and restore fluid movement. Over time, you’ll notice:
- Better posture and alignment
- Greater range of motion in your legs
- Relief from hip and lower back tension
- A calm, grounded mind after every stretch
Now, let’s begin your 3-minute challenge!
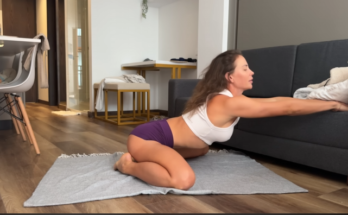
2. Getting Into Frog Pose: Step-by-Step
Start on all fours — hands under shoulders and knees under hips. Take a few deep breaths to center yourself. Then slowly begin to move your knees wider apart, keeping your hips aligned with your knees.
Your shins should be parallel to each other, toes pointing outwards slightly. Lower down onto your forearms, keeping your chest lifted and your gaze forward.
Breathe deeply. Feel your inner thighs stretching and your hips gently opening. Don’t force it — let your body sink naturally.
If you’re new to this pose, it may feel intense at first. That’s okay! Flexibility grows gradually. Listen to your body, and don’t push past discomfort. You’re here to awaken your hips, not strain them.
3. The 3-Minute Frog Pose Flow
Let’s break it down minute by minute:
Minute 1 – Settling In
Focus on your breath. Inhale slowly through your nose, and exhale through your mouth. Feel your hips begin to relax with every breath out.
Your body might shake or resist at first — that’s just tension releasing. Keep your forearms grounded and your spine long. Gently rock your hips forward and backward to increase the stretch dynamically.
This small movement stimulates circulation and warms the inner thighs, preparing your muscles for deeper release.
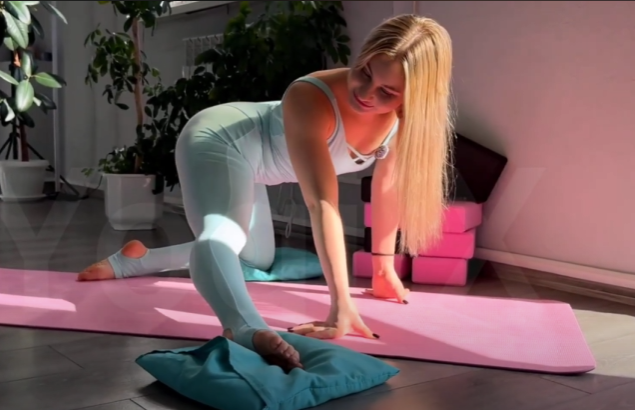
Minute 2 – Deepening the Stretch
Now that your body is warming up, try to inch your knees slightly wider apart. Sink your hips closer to the mat.
Keep breathing deeply — this is where transformation happens. Visualize your hips opening like a flower in sunlight. Allow gravity to help you relax deeper without forcing it.
If you’d like to intensify the pose, you can place a yoga block or pillow under your chest for support and hold your position longer. Feel the tension melting away.
Minute 3 – Stillness and Focus
The final minute is about stillness. Close your eyes, breathe, and let your body find peace.
Notice how your hips feel — open, stretched, yet supported. Focus on the sensations in your thighs and groin. With each exhale, imagine your body releasing one more layer of tightness.
Stay completely present in the moment. You’ve earned it.
4. Coming Out of Frog Pose Safely
When your timer ends, don’t rush out of the pose. Bring your awareness back to your breath. Slowly move your hips back toward your heels, bringing your knees closer together.
Transition into Child’s Pose — rest your chest on your thighs and stretch your arms forward. Take three deep breaths here to release any lingering tension.
Then rise up slowly, sitting back on your heels or in a comfortable cross-legged position.
Notice how your body feels — lighter, looser, and more open. That’s the power of the Frog Pose.
5. The Challenge Routine: Make It a Daily Habit
To truly see results, consistency is key. You don’t need hours — just three minutes a day. Here’s a simple plan to follow:
Day 1–3: Focus on alignment. Keep your knees, hips, and ankles safe. Go slow.
Day 4–7: Begin to hold the pose longer, breathing more deeply into tight spots.
Day 8–14: Add gentle movements — sway, pulse, or circle your hips.
Day 15+: Try holding the full stretch for the full three minutes without movement.
After two weeks, you’ll start noticing real changes: your hips will feel more open, your legs lighter, and your flexibility improved. Even sitting or walking will feel different — smoother and more effortless.
6. The Mind-Body Connection
The beauty of the Frog Pose isn’t just physical. It’s deeply emotional and mental too. The hips are known in yoga as the storage house for emotions — especially tension, stress, and unexpressed feelings.
When you open your hips, you release more than muscle tightness. You let go of emotional blocks and invite calmness. That’s why many people feel lighter, even emotional, after practicing deep hip openers like Frog Pose.
So, when you hold this pose, don’t just stretch your body — breathe through your feelings. Allow your breath to guide you through discomfort and toward release. It’s a meditation in motion.
7. Common Mistakes and How to Avoid Them

To make the most out of your daily Frog Pose challenge, keep these points in mind:
- Don’t force your knees too wide.
Go only as far as your body comfortably allows. Forcing it can lead to joint strain. - Keep your hips in line with your knees.
If your hips move too far forward or back, the stretch loses its effectiveness. - Engage your core.
Even though it’s a stretch, engaging your core muscles protects your lower back. - Use support if needed.
Place a yoga mat, towel, or blanket under your knees to avoid discomfort on hard floors. - Breathe continuously.
The key to flexibility is oxygen flow — never hold your breath!
8. Bonus: Combine with These Poses for Maximum Results
If you have more than three minutes, pair your Frog Pose with these other hip-opening moves for a complete flexibility routine:
- Butterfly Pose (Baddha Konasana) – Stretches the inner thighs and groin.
- Pigeon Pose (Eka Pada Rajakapotasana) – Deepens hip flexibility and glute stretch.
- Low Lunge (Anjaneyasana) – Opens the hip flexors and quads.
- Happy Baby Pose (Ananda Balasana) – Gentle release for the lower back and hips.
Doing these in sequence can take 10 minutes — a perfect mini yoga flow for flexibility and calm energy.
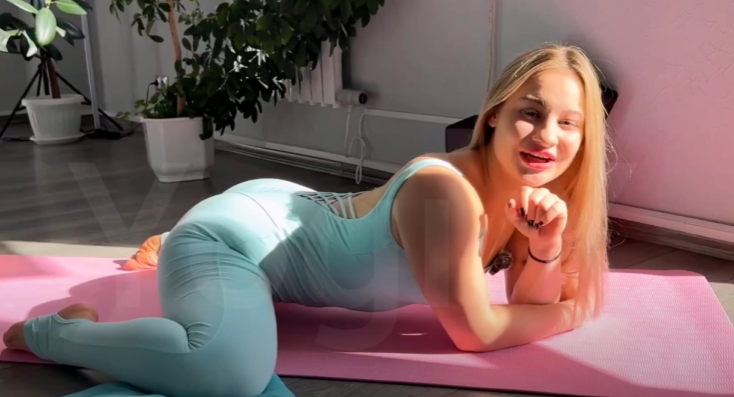
9. Celebrate Your Progress
Every time you practice, celebrate your progress — no matter how small. Maybe your knees move a bit wider today, or your hips feel less tight. Maybe your breathing becomes steadier or your mind calmer.
Each stretch is a victory. Each day you show up is a step toward greater freedom in your body and peace in your mind.
Take a moment to smile and say, “I did it.” Because you did. 🥰
10. Final Thoughts: Flexibility for Life
The Frog Pose Challenge 🐸 isn’t just about stretching; it’s about transformation. Three minutes a day can make your body more flexible, your mind more focused, and your energy more alive.
Over time, you’ll notice the difference — walking feels smoother, sitting feels easier, and your hips feel lighter. That’s the beauty of consistent practice: progress sneaks up on you until one day, you realize how far you’ve come.
So roll out your mat, play your favorite soft music, and start your 3-minute journey. Move gently, breathe deeply, and smile through the stretch.
Because flexibility isn’t about forcing change — it’s about allowing it.