
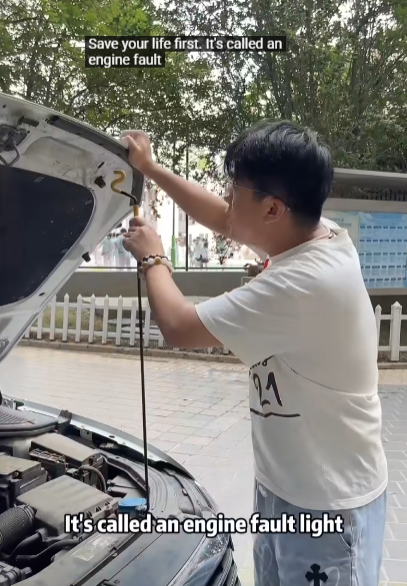
The check engine light is one of the most common—and often most frustrating—warning lights on a car’s dashboard. It can show up at the most inconvenient time, causing worry and uncertainty for drivers. While this light doesn’t always mean something serious, ignoring it is never a good idea. Thankfully, in many cases, you can diagnose and sometimes remove the check engine light yourself without needing to rush to a mechanic.
In this guide, we’ll walk through what the check engine light means, why it comes on, and the different methods you can use to turn it off safely on your own.
What Does the Check Engine Light Mean?
The check engine light (often displayed as an engine-shaped symbol) is part of your car’s onboard diagnostics system (OBD-II). When the vehicle’s computer detects an issue with the engine, emissions system, or other vital components, it turns on this warning.
Some common causes include:
- Loose or faulty gas cap
- Oxygen sensor malfunction
- Mass air flow (MAF) sensor issues
- Worn-out spark plugs or ignition coils
- Catalytic converter trouble
- Exhaust or emissions system problems
The severity can range from minor (like a loose gas cap) to major (such as engine misfiring). That’s why the first step is always to diagnose the problem before simply resetting the light.
Step 1: Check the Gas Cap
Surprisingly, one of the most common reasons for a check engine light is a loose or faulty gas cap. If your cap isn’t tightened properly after refueling, it can trigger the system to think there’s a leak in the fuel system.
What to do:
- Pull over and safely turn off your car.
- Remove the gas cap and inspect it for cracks or wear.
- Screw it back on tightly until you hear a few clicks.
- Drive for a few trips. The light may reset itself within 50–100 miles.
If the cap is damaged, replacing it with a new one is a simple, inexpensive fix.
Step 2: Use an OBD-II Scanner
If the gas cap isn’t the issue, the next best step is to use an OBD-II scanner. These devices plug into the OBD-II port in your vehicle (usually under the dashboard near the steering wheel). Many affordable scanners are available online or at auto parts stores. Some even connect via Bluetooth to your smartphone.
How to use it:
- Turn off the car and plug the scanner into the OBD-II port.
- Start the car and allow the scanner to read the codes.
- Look up the diagnostic trouble codes (DTCs) online or in the scanner’s manual.
- Address the issue as needed.
Once the problem is fixed, you can use the scanner to clear the code, which turns off the check engine light.
Step 3: Try a Manual Reset
If you don’t have a scanner, there are still ways to reset the check engine light. One common method involves disconnecting the car battery, though this should be done carefully.
How to manually reset:
- Turn off your vehicle.
- Use a wrench to disconnect the negative battery cable.
- Wait about 15 minutes to allow the vehicle’s system to reset.
- Reconnect the cable and tighten it securely.
- Start the engine and see if the light is off.
Keep in mind, this method will reset your car’s computer, which also clears other settings such as the clock or radio presets. If the underlying issue isn’t fixed, the light may come back on.
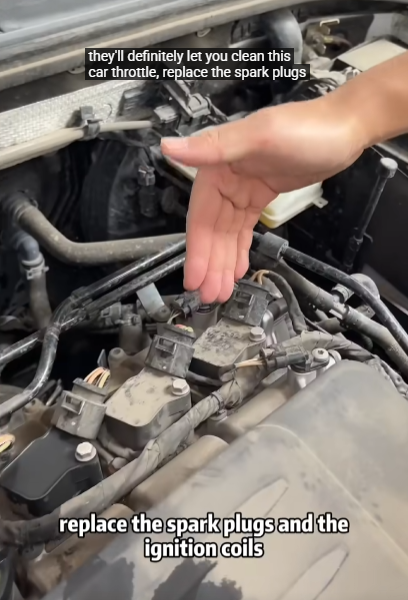
Step 4: Check Spark Plugs and Wires
Old or faulty spark plugs and ignition wires can cause misfires that trigger the check engine light. If you’re comfortable with basic car maintenance, replacing spark plugs can often be done at home.
Signs spark plugs may need replacing:
- Engine misfires or rough idling
- Trouble starting the car
- Poor fuel economy
Replacing spark plugs usually costs little and can make a huge difference in performance as well as removing the check engine light.
Step 5: Inspect and Replace Sensors
Modern cars rely heavily on sensors to monitor engine performance. The oxygen sensor (O2 sensor) and mass air flow (MAF) sensor are two of the most common culprits behind a glowing check engine light.
- Oxygen sensor: Helps monitor unburned oxygen in exhaust gases. If faulty, it can affect fuel economy and increase emissions.
- MAF sensor: Measures the air entering the engine. A bad sensor can cause stalling or difficulty starting.
Replacing these sensors is doable for many DIYers, especially with online tutorials and guides specific to your vehicle model.
Step 6: Allow the Light to Turn Off Naturally
In some cases, if the problem was minor and has been corrected, the check engine light may turn off on its own after a few drive cycles. This usually happens within 3–5 trips once the car’s computer verifies the issue no longer exists.
For example, tightening a loose gas cap may not shut the light off immediately, but after several starts and stops, the system resets itself.

Important Tips and Warnings
- Don’t ignore flashing lights: If your check engine light is blinking instead of steady, it usually indicates a severe engine misfire. This can damage the catalytic converter and should be addressed immediately by a professional.
- Fix the problem, not just the light: Resetting the light without addressing the root issue may hide a bigger problem that worsens over time.
- Use quality parts: If you replace components like sensors or spark plugs, using reliable brands reduces the risk of the problem returning.
- Keep safety first: If you’re not confident in performing certain repairs, it’s better to consult a mechanic.
When to Visit a Mechanic
While many check engine light issues can be resolved at home, not all problems should be handled without professional help. Seek a mechanic if:
- The light is flashing continuously.
- The car runs rough, stalls, or loses power.
- You notice strange smells (like rotten eggs, which can indicate catalytic converter failure).
- You’ve reset the light multiple times but it keeps returning.
A trusted mechanic has advanced diagnostic tools and experience to find and fix the issue accurately.

Conclusion
Seeing the check engine light come on can be stressful, but it doesn’t always mean disaster. By following a few simple steps—checking the gas cap, scanning for error codes, or resetting the system—you can often remove the check engine light yourself.
Remember, though, the light is there for a reason. It’s your car’s way of telling you something needs attention. Ignoring it completely could lead to bigger, more expensive problems down the road.
With a little patience and basic tools, many drivers can tackle this issue on their own, saving both time and money. Still, when in doubt, don’t hesitate to seek professional advice to ensure your car stays safe and reliable on the road.