
Seeing the fault light illuminate on your car’s dashboard can be a stressful experience. While it’s always advisable to consult a professional for major issues, some common fault lights can be diagnosed and fixed at home. This guide will walk you through identifying the problem, troubleshooting potential causes, and resolving them safely.
Understanding Your Car’s Fault Light
Most modern vehicles have multiple dashboard warning lights, each indicating different issues. Some of the most common ones include:
- Check Engine Light (CEL)
- Battery Warning Light
- Oil Pressure Warning Light
- Tire Pressure Monitoring System (TPMS) Light
- Brake System Warning Light
Knowing what each of these lights means is the first step in troubleshooting the issue.

Step 1: Identify the Fault Light
When a warning light appears, take a moment to assess its color and symbol:
- Red Light: Immediate attention required.
- Yellow/Orange Light: Warning; check soon.
- Flashing Light: Critical issue; stop driving immediately.
Refer to your vehicle’s manual to confirm what the specific light represents.
Step 2: Use an OBD-II Scanner
A simple way to diagnose the issue is by using an OBD-II scanner (On-Board Diagnostics). Here’s how:
- Locate the OBD-II Port: Usually under the dashboard near the driver’s seat.
- Plug in the Scanner: Connect your OBD-II scanner to the port.
- Read the Codes: The scanner will generate error codes indicating the problem.
- Interpret the Codes: Search the meaning of the codes online or in your car’s manual.
This step will help pinpoint the cause of the fault light.
Step 3: Fix Common Fault Light Issues
1. Check Engine Light (CEL)
Possible Causes: Loose gas cap, faulty oxygen sensor, spark plug issues.
Fix:
- Tighten or replace the gas cap.
- Use an OBD-II scanner to check for sensor-related issues.
- Replace spark plugs if necessary.
2. Battery Warning Light
Possible Causes: Weak battery, loose terminals, faulty alternator.
Fix:
- Inspect battery terminals for corrosion and clean if needed.
- Check for loose connections and tighten them.
- Test the battery voltage; replace if weak.
3. Oil Pressure Warning Light
Possible Causes: Low oil level, oil pump malfunction.
Fix:
- Check oil levels using the dipstick.
- If low, add the recommended oil type.
- If the problem persists, consult a mechanic.
4. TPMS Light (Tire Pressure Warning)
Possible Causes: Low tire pressure, faulty TPMS sensor.
Fix:
- Use a tire pressure gauge to check each tire.
- Inflate tires to the recommended PSI.
- If light stays on, reset the TPMS system (refer to manual).
5. Brake System Warning Light
Possible Causes: Low brake fluid, worn brake pads, faulty sensor.
Fix:
- Check brake fluid level and top up if necessary.
- Inspect brake pads for wear.
- If light persists, seek professional help.
Step 4: Reset the Fault Light
After fixing the issue, you may need to reset the warning light. Here’s how:
- Use an OBD-II Scanner: Some scanners allow you to clear error codes.
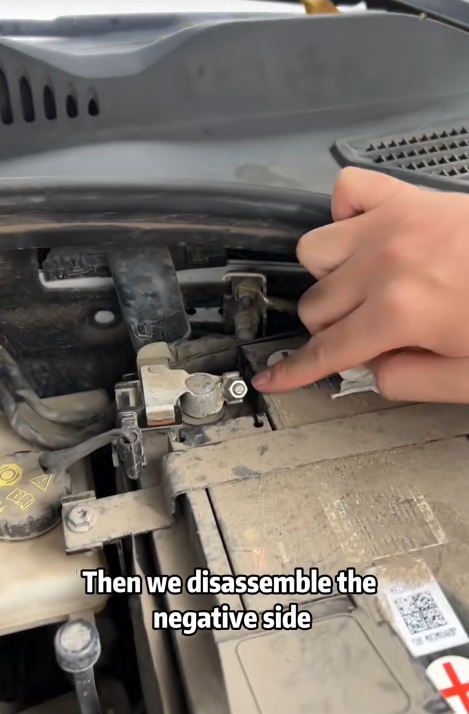
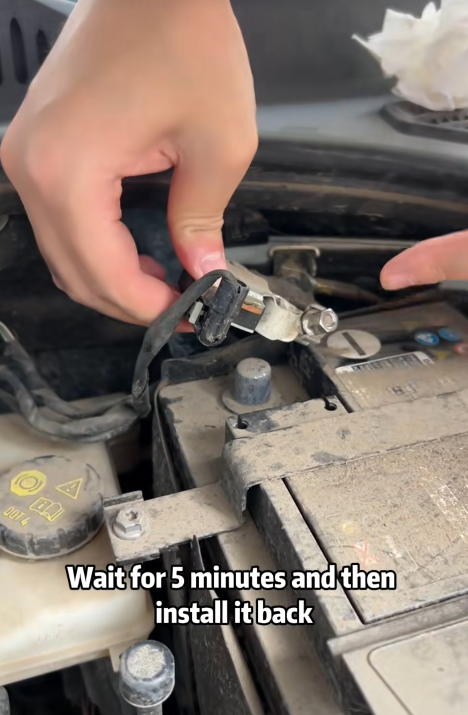
- Disconnect the Battery: Remove the negative terminal for 10-15 minutes, then reconnect.
- Drive Your Car: Some warning lights turn off automatically after a few trips if the issue is resolved.
When to Seek Professional Help
If the fault light persists after trying these fixes, it’s best to take your car to a certified mechanic. Ignoring warning lights can lead to severe damage or safety hazards.
Final Thoughts
Fixing your car’s fault light yourself can save time and money. By understanding what each warning light means, using an OBD-II scanner, and following the right steps, you can diagnose and resolve common car issues at home. However, for complex problems, always seek professional assistance.
Do you have experience fixing your car’s fault light? Share your tips in the comments below!