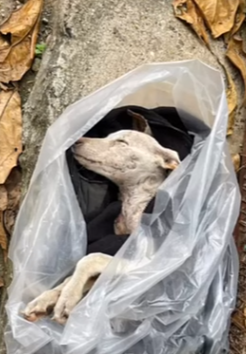
On a quiet morning, just before the city fully woke up, a passerby noticed something unusual beside a cold metal trash can at the edge of a narrow street. At first glance, it looked like a discarded bag—crumpled, still, forgotten. But as the wind shifted, the plastic moved ever so slightly. That small movement changed everything.
Inside the plastic bag was a dog.
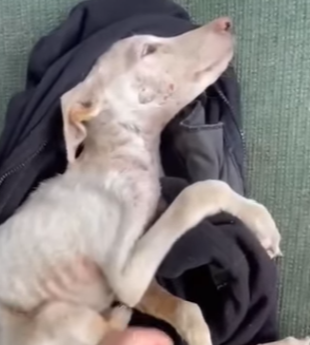
He was small, thin, and silent, curled into himself as if trying to disappear. Whoever had left him there had tied the bag loosely, not caring whether he would be found or not. To them, he seemed to have been reduced to an object—something unwanted, something thrown away. But he was not an object. He was alive. He was frightened. And he was waiting.
The passerby knelt down carefully, heart pounding. When the bag was gently opened, two tired eyes looked up—clouded with fear, confusion, and something deeper: a quiet acceptance that broke the heart. The dog did not bark. He did not struggle. He simply lay there, shivering slightly in the morning chill, as if he had learned that resisting made no difference.
Wrapped in a warm jacket, the dog was carried away from the trash can that had been his last companion. The street returned to its normal rhythm, but that moment would stay forever with the person who found him. Some images don’t fade easily—especially those that reveal how cruel the world can be, and how fragile life truly is.
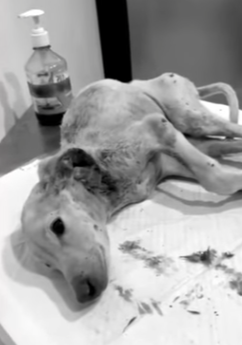
At the rescue center, the dog was examined gently. He was weak, dehydrated, and exhausted, but still holding on. No one knew how long he had been left there. Hours? Overnight? The answers didn’t matter as much as what came next.
They gave him a name: Hope.
It was a simple name, but one filled with meaning. Because despite everything, Hope was still breathing. Still here. Still capable of trusting again, even if just a little.
The first days were quiet. Hope slept often, curled up in a soft blanket far away from cold metal and plastic. Volunteers spoke to him softly, moving slowly so as not to frighten him. At first, he flinched at sudden sounds. He watched hands carefully, unsure whether they would bring comfort or harm.
But hands kept coming—with warmth, food, and patience.
Each small act of kindness began to leave a mark. Hope started eating regularly. His eyes grew clearer. His body, once tense and guarded, slowly began to relax. One afternoon, as a volunteer sat beside him reading quietly, Hope rested his head against her leg. It was a tiny gesture, but it meant everything.
Trust was returning.
No one at the rescue center could understand how someone could leave a living being in a plastic bag beside a trash can. But instead of letting anger take over, they focused on healing. Hope didn’t need questions answered—he needed safety, time, and love.
As days turned into weeks, his personality emerged. He liked sunshine and would sit quietly near the window, watching dust float through the light. He enjoyed gentle walks and sniffing the grass, as if rediscovering the world piece by piece. Sometimes he wagged his tail—not wildly, but carefully, as if testing whether happiness was allowed.
The volunteers celebrated every small milestone. The first playful bow. The first bark. The first time Hope approached someone on his own. These moments were reminders that even when life tries to silence a soul, it can still find its voice again.
Hope’s story spread quietly. Visitors asked about “the dog from the plastic bag,” and each time the story was told, there was sadness—but also determination. Because Hope was proof that cruelty does not have the final word.
One day, a family came to the center. They didn’t want a “perfect” dog. They wanted one who needed them as much as they needed him. When they met Hope, he approached slowly, sniffed their hands, and then sat down calmly at their feet.
It felt right.

The adoption was gentle and unhurried. Hope left the rescue center with a new collar, a soft bed, and something he had almost lost forever—a future. In his new home, he learned routines, warmth, and the joy of belonging. The trash can, the plastic bag, the cold morning—all of that faded into the past.
But his story remained.
It became a reminder of how easily lives can be discarded—and how powerfully they can be restored. Hope was never an inanimate object. He was a living being with feelings, fear, and the ability to love. He deserved care from the very beginning, but even when that care was denied, he survived long enough to find it.
For every Hope that is found in time, there are others still waiting. That is why stories like his matter. They ask us to look closer, to act sooner, and to remember that compassion is not optional—it is necessary.
Because sometimes, the smallest movement in a forgotten plastic bag can change a life.