Taking care of your car doesn’t always mean rushing to the nearest mechanic. With a little time, patience, and the right tools, you can save money and feel empowered by learning how to replace basic car parts yourself. This guide will walk you through the process of replacing several common car parts on your own, safely and efficiently—even if you’re a beginner.
Tools and Safety First
Before you begin replacing any car part, make sure you have:
- A basic set of tools (socket wrench set, screwdrivers, pliers)
- Car jack and jack stands
- Work gloves and safety glasses
- Vehicle owner’s manual
- Replacement parts
- A clean, well-lit work area
Important: Always park your car on a flat surface, apply the parking brake, and disconnect the battery before working under the hood.
1. Replacing the Air Filter
The air filter keeps dirt and debris from entering your engine. A dirty air filter can reduce fuel efficiency and engine performance.
Steps:
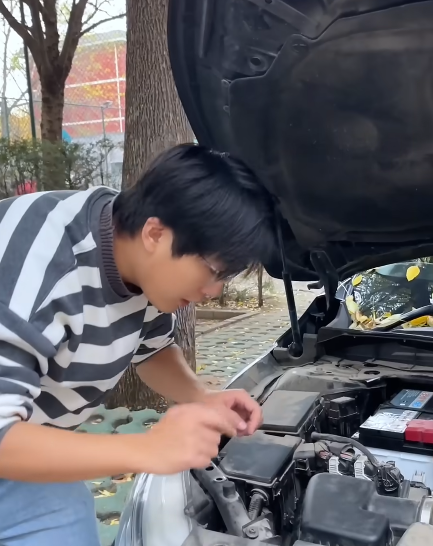
- Open the hood and locate the air filter housing—usually a black plastic box near the engine.
- Unclip or unscrew the cover.
- Remove the old filter and inspect it.
- Insert the new filter in the same orientation.
- Close the housing and secure it.
Time required: 5–10 minutes
Tools needed: Usually none
2. Changing Windshield Wipers
Worn-out wiper blades reduce visibility during rain and can damage your windshield.
Steps:
- Lift the wiper arm away from the windshield.
- Press the release tab and slide off the old blade.
- Attach the new blade until it clicks into place.
- Carefully lower the wiper back.
Time required: 10 minutes
Tools needed: None

3. Replacing Engine Oil and Oil Filter
Changing your oil regularly keeps your engine healthy and prolongs its life.
Steps:
- Jack up the car and place it securely on jack stands.
- Place a pan under the oil drain plug.
- Unscrew the plug and let the oil drain completely.
- Remove the old oil filter.
- Apply fresh oil to the gasket of the new filter and screw it in.
- Replace the drain plug.
- Add new oil from the top of the engine using a funnel.
Time required: 30–45 minutes
Tools needed: Wrench, oil filter wrench, drain pan, funnel
4. Changing the Car Battery
A weak or dead battery is one of the most common causes of breakdowns.
Steps:
- Turn off the car and disconnect the negative terminal first, then the positive.
- Unscrew the bracket or clamp holding the battery.
- Remove the old battery and replace it with the new one.
- Reconnect the terminals: positive first, then negative.
- Apply some petroleum jelly to prevent corrosion.
Time required: 15–20 minutes
Tools needed: Wrench or socket set
5. Replacing Headlights or Taillights
A burnt-out bulb can be a safety hazard and a reason for getting pulled over.
Steps:
- Open the hood or trunk to access the back of the light housing.
- Twist and pull out the old bulb holder.
- Replace the bulb (avoid touching the glass with your fingers).
- Reinsert the holder and test the light.
Time required: 10–30 minutes (depends on car model)
Tools needed: Screwdriver (sometimes)

6. Changing Brake Pads (Front Disc Brakes)
If your brakes squeal or don’t stop well, you might need new pads.
Steps:
- Loosen lug nuts, raise the car, and remove the wheel.
- Locate the caliper and remove the bolts holding it.
- Slide out the old brake pads.
- Compress the caliper piston using a C-clamp.
- Insert new pads.
- Reinstall the caliper and wheel.
Time required: 1–2 hours
Tools needed: Lug wrench, socket set, C-clamp
Note: Only attempt this if you’re confident. Brakes are critical for safety!
7. Replacing Spark Plugs
Worn spark plugs can cause rough idling, poor acceleration, or misfires.
Steps:
- Remove the spark plug wire or coil pack from each cylinder.
- Use a spark plug socket and extension to unscrew the old plug.
- Check the gap of the new plug (if necessary).
- Screw in the new plug by hand first, then tighten with a wrench.
- Reattach the wire or coil pack.
Time required: 30–60 minutes
Tools needed: Spark plug socket, ratchet, extension bar
8. Changing a Flat Tire
Knowing how to do this is essential for emergencies.
Steps:
- Turn on hazard lights and use wheel wedges.
- Loosen the lug nuts before jacking up the car.
- Jack up the car and remove the lug nuts and flat tire.
- Mount the spare tire and hand-tighten lug nuts.
- Lower the car and fully tighten the nuts in a crisscross pattern.
Time required: 20–30 minutes
Tools needed: Jack, lug wrench, spare tire

Tips for a Successful DIY Experience
- Keep Your Owner’s Manual Handy: It contains valuable diagrams and specifications.
- Take Photos Before Disassembly: Helps you remember how parts go back together.
- Label Parts and Bolts: Especially helpful for more complex jobs.
- Watch Video Tutorials: YouTube has guides for nearly every make and model.
- Buy Quality Parts: Cheap parts may save money short-term but can fail early.
When to Call a Professional?
While many parts are beginner-friendly, some repairs are best left to professionals:
- Timing belt/chain replacement
- Transmission repair
- Airbag systems
- Advanced diagnostics
If you’re unsure or feel overwhelmed, it’s okay to get help. Safety should always come first.
Final Thoughts
Replacing car parts yourself can be an empowering and money-saving hobby. Start with small jobs, take your time, and gradually build confidence. With the right attitude and tools, you’ll be surprised at how much you can accomplish in your own garage. Happy wrenching! 🧰🚙


