The dog had no name, no collar, and no place to belong. He wandered the streets silently, his ribs visible beneath a coat once thick and strong. Every step he took told a story of exhaustion, hunger, and quiet endurance. To most people, he was just another stray. But behind his tired eyes was a heartbreaking struggle for survival that few ever noticed.
He had not always been alone. There were memories—faint but persistent—of warmth, of a hand resting gently on his head, of a voice calling him from a doorway. Those memories haunted him now, surfacing whenever he smelled cooked food or heard laughter drifting from a home. Each reminder made his loneliness deeper, but it also kept him moving, searching for something he could no longer name.
The streets were unforgiving. During the day, the heat burned his paws as he walked across cracked pavement. At night, the cold crept into his bones, making sleep impossible. He learned to curl himself tightly beneath abandoned cars or behind piles of trash, using whatever shelter he could find. Rain was the worst. When it came, it soaked through his thin fur, leaving him shivering long after the clouds passed.
Hunger was his constant companion. He scavenged through garbage bins, careful to avoid sudden movements or loud noises. More than once, he was chased away with harsh words or thrown objects. Each rejection chipped away at his spirit, teaching him to keep his head low and his tail tucked close to his body. Still, hunger always won. No matter how afraid he felt, he had to keep searching.
His body bore the marks of life on the streets. Small wounds that never fully healed, patches of fur missing, and a limp in his back leg from an old injury. Pain had become so normal that he barely reacted to it anymore. What hurt more was the fear—the constant uncertainty of where his next meal would come from, or whether he would survive another night.
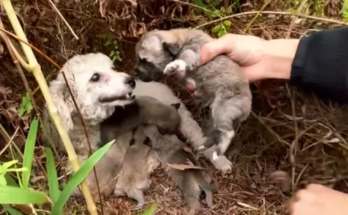
Despite everything, the stray dog’s heart had not hardened. When children passed by, he watched them from a distance, his tail giving a hopeful twitch. When someone dropped food, he approached slowly, eyes full of caution but gratitude shining through. He wanted to trust. He wanted to believe that kindness still existed.
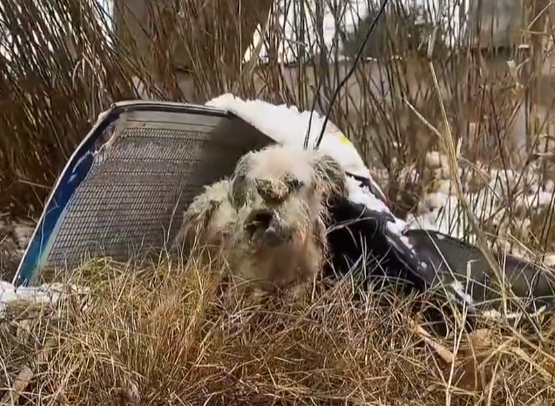
One evening, as the sun dipped below the horizon, he collapsed near a closed shop. His legs trembled beneath him, refusing to carry him any farther. Hunger, dehydration, and exhaustion had finally taken their toll. He lay there, breathing shallowly, barely lifting his head when footsteps approached. This time, he did not move away. He didn’t have the strength.
A woman noticed him as she walked by. She stopped, her heart tightening at the sight of his fragile body. Kneeling slowly, she spoke in a soft voice. The dog flinched at first, expecting pain or rejection, but none came. Instead, she placed a small bowl of water beside him. He drank weakly, each sip bringing him back from the edge.
Help came quickly after that. The woman contacted a local rescue, and soon the dog was wrapped in a blanket and taken away from the streets. Even then, he shook—not from cold, but from fear of the unknown. He had learned that safety could disappear at any moment.
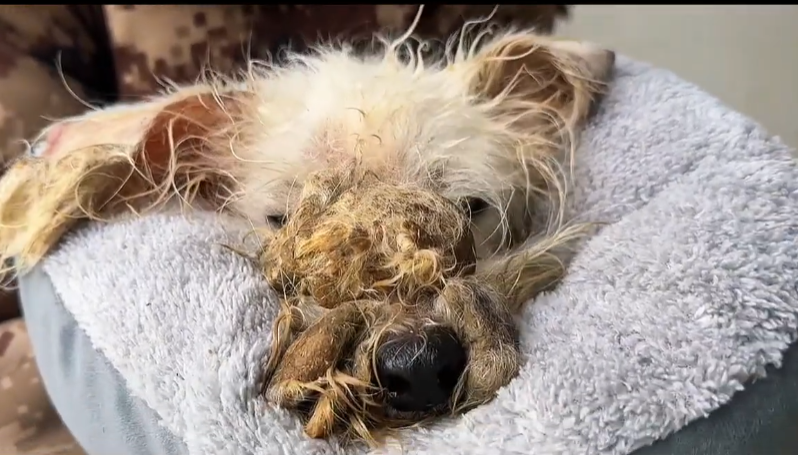
At the shelter, veterinarians discovered how serious his condition was. He was malnourished, anemic, and suffering from infections that had gone untreated for months. Recovery would take time, patience, and care. As he rested in a warm kennel, he slept deeply, his body finally allowed to relax. For the first time in a long while, he did not need to stay alert for danger.
Days turned into weeks. Slowly, the stray dog began to change. His eyes grew brighter. His appetite returned. The limp in his leg improved with treatment. But the emotional wounds took longer to heal. Sudden movements still made him flinch. Loud noises sent him retreating to the back of his space. Trust, once broken, does not return easily.

The shelter staff worked gently with him. They spoke softly, moved slowly, and respected his boundaries. Each small step mattered. A wag of the tail. A curious sniff. A cautious lean into a gentle touch. These moments were victories, signs that his heart was beginning to open again.
One day, he approached the kennel door when someone entered the room. His tail wagged—just slightly—but it was enough. He was learning that not all humans would hurt him. Some would stay. Some would care.
Eventually, a family came to meet him. They sat quietly on the floor, letting him approach in his own time. He sniffed their hands, then sat beside them, unsure but hopeful. When one of them gently scratched behind his ears, he closed his eyes. In that moment, his struggle felt farther away than it ever had before.
The day he left the shelter, the dog looked back only once. The streets that had shaped his pain were behind him now. Ahead lay warmth, safety, and a chance to begin again. He did not know what the future held, but for the first time, it did not terrify him.
A stray dog’s struggle is heartbreaking because it is so often unseen. These animals endure hunger, fear, and loneliness with quiet resilience. Yet their hearts remain capable of immense love. All they need is someone willing to notice, to care, and to act.
His story is not just about survival—it is about hope. And it reminds us that even the most broken hearts can heal when met with compassion.