A Complete Guide to Making and Using Your Own Rounded Concrete Trowel
When it comes to concrete finishing, having the right tools makes all the difference. One specialized tool that professionals often use—but many DIYers overlook—is the radius concrete trowel. This curved-edge trowel allows for smooth, rounded finishes along edges and surfaces, reducing the risk of chipping and giving your concrete project a more polished, professional look.
But did you know you can make your own DIY radius concrete trowel at home? In this step-by-step guide, we’ll show you how to build one from scratch and use it effectively on your next concrete job.
Why Use a Radius Concrete Trowel?
Concrete trowels come in all shapes and sizes, each suited for a particular task. A radius concrete trowel, also called a rounded-edge trowel, has curved sides that prevent the edges from digging into the wet concrete. Here are a few benefits:
- Smooth, rounded edges: Perfect for decorative concrete, steps, or sidewalks.
- Reduces surface marks: Unlike square-edge tools, a radius trowel glides without leaving harsh lines.
- Ideal for beginners: The rounded edge is forgiving and less likely to gouge wet surfaces.
Whether you’re smoothing out a concrete countertop, patio, or walkway, a radius trowel can elevate the quality of your finish.
Tools and Materials You’ll Need
Creating your own radius trowel is simpler than it sounds. You’ll need:
- A flat steel trowel or an old finishing trowel
- Bench grinder or metal file
- Marker or chalk
- Measuring tape or ruler
- Sandpaper or a sanding block
- Protective gloves and goggles
If you already have an old trowel lying around, even better—you’ll be giving it new life as a custom tool.
Step-by-Step: How to Make a Radius Concrete Trowel
Step 1: Mark the Radius
Lay your trowel flat on a work surface. Use a round object (like a paint can lid or bowl) as a template to trace the curved edge on both corners of the trowel. Make sure both curves are symmetrical. A 2-3 inch radius is usually perfect for general concrete work.
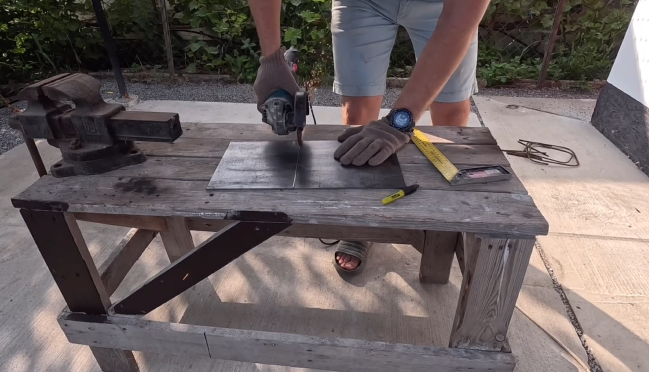
Step 2: Cut or Grind the Curve
Using a bench grinder or a sturdy metal file, slowly remove the metal from the corners of the trowel, following your marked line. Go slowly and take frequent breaks to avoid overheating the steel. Wear gloves and goggles to protect yourself from sparks or sharp edges.
Step 3: Smooth and Sand
Once the rough curve is shaped, use sandpaper or a sanding block to smooth out the edge. This is crucial for a clean finish when working with wet concrete. A smooth edge reduces drag and helps produce a flawless finish.
Step 4: Test the Tool
Before taking it to your concrete project, give your DIY radius trowel a test run on a scrap board or slab. Check that it glides easily without catching or scratching.
Using Your Radius Trowel: Best Practices
Now that you’ve crafted your own custom trowel, it’s time to put it to use. Here’s how to get the best results:
1. Start with a Screeded Surface
Before troweling, make sure the concrete is properly poured and screeded (leveled with a screed board). Your surface should be roughly flat but still moist.
2. Timing Is Key
Start troweling when the concrete begins to firm up—usually when you can press a finger lightly and leave a shallow mark. Troweling too early will pull water to the surface and weaken the concrete.
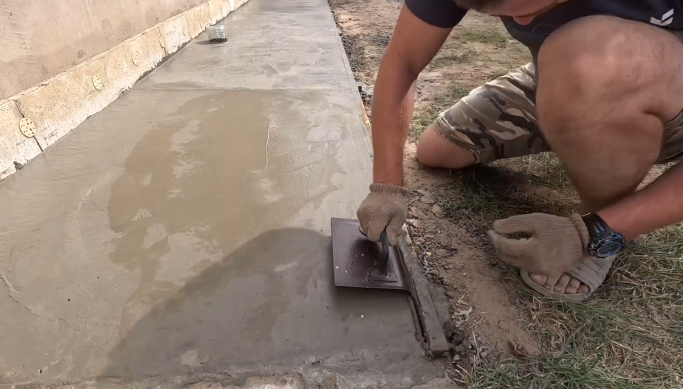
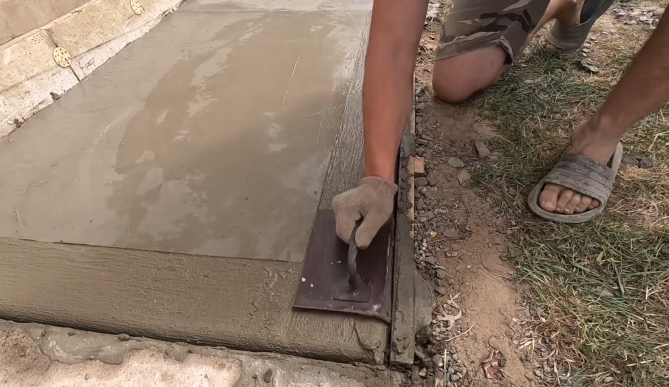
3. Glide, Don’t Push
Use your radius trowel to gently float over the surface. Apply moderate pressure and work in long, overlapping arcs. Let the curved edges do the work—they’ll smooth without cutting into the slab.
4. Multiple Passes
You may need to trowel your concrete several times. With each pass, the surface will become denser and shinier. For best results, let the concrete firm up slightly between passes.
When to Use a Radius Trowel
Here are some of the most common projects where a DIY radius concrete trowel shines:
- Concrete countertops: Achieve a clean, rounded finish on kitchen islands or worktops.
- Sidewalks and walkways: Prevent chipping along edges.
- Concrete steps: Perfect for creating safe, rounded corners.
- Driveway edges: Improve durability and aesthetics.
For decorative or exposed concrete, this type of trowel gives a softer, more professional look than hard right angles.
Maintenance and Storage
Your DIY trowel is a durable tool, but like all equipment, it needs proper care:
- Clean after each use: Rinse concrete residue immediately before it hardens.
- Dry thoroughly: Prevent rust by wiping the trowel dry before storing.
- Store flat: Keep your tool in a dry toolbox or hang it on a pegboard.
Occasionally re-sharpen or re-sand the curved edges if they become rough or worn.
Can You Customize It Further?
Absolutely! Once you get the hang of crafting your own trowel, you might consider making a few variations for different tasks:
- Mini radius trowel: Great for tight corners or smaller pours.
- Flexible steel blade: For ultra-smooth finishes on decorative slabs.
- Offset handle: For reaching into tight spots or complex molds.
The beauty of DIY tools is that you can make them fit your exact needs.

Final Thoughts
Making your own DIY radius concrete trowel isn’t just a money-saving project—it’s a way to take your concrete work to the next level. Whether you’re a weekend warrior, hobbyist, or beginner builder, having the right tools helps you produce cleaner, safer, and more professional-looking results.
With just a bit of time and some basic tools, you can craft a trowel that performs just as well as store-bought options—and maybe even better. Plus, there’s something incredibly satisfying about building a tool with your own hands and seeing it in action.
So next time you’re gearing up for a concrete job, reach for the trowel you made yourself. You’ll not only save money but also gain confidence with every smooth pass.