When it comes to building a strong and durable home, it all begins with the foundation. Among the various options available, the strip foundation on piles is one of the most popular solutions for private and small-scale residential construction. This method combines the deep support of piles with the load-distribution capabilities of a strip footing, making it a perfect choice for uneven, weak, or waterlogged soil. In this article, we’ll walk through all the stages of this foundation process—from driving piles to formwork and insulation—highlighting the use of modern materials like Penoplex and showcasing how each stage can be efficiently captured in one comprehensive video.
Stage 1: Planning and Site Preparation
Every successful construction project begins with careful planning. Before laying a single pile, it’s crucial to understand the soil conditions, determine the load-bearing capacity, and plan the foundation layout.
- Site Survey: A geotechnical survey helps identify soil type and depth of stable layers.
- Foundation Design: Based on the results, engineers design a foundation combining piles (for depth stability) and a strip (to spread the load).
- Marking the Site: Using ropes and wooden stakes, the construction team outlines where each pile and strip footing will go.
Capturing this stage in the video helps explain the “why” behind the decisions. A voiceover can describe the survey results and show the foundation sketch coming to life on-site.

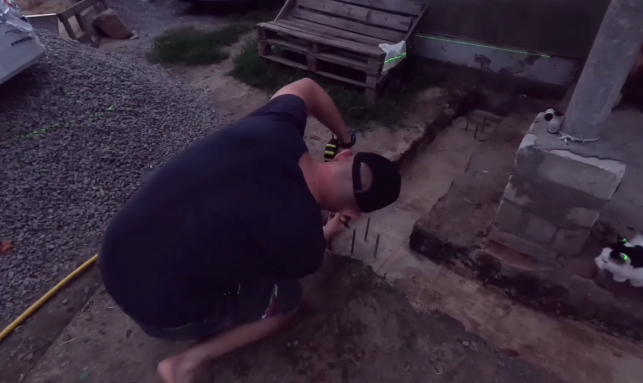
Stage 2: Pile Installation
Piles are deep foundation elements driven or drilled into the ground to support the structure above. For residential use, screw piles or bored piles are common choices.
- Drilling Holes or Driving Screw Piles: Depending on soil and pile type, machinery is used to drive the piles into the ground to the required depth.
- Ensuring Alignment: Piles are aligned carefully, with their tops leveled to prepare for the concrete strip that will be poured later.
This stage is visually dynamic for video. The process of heavy equipment working, piles going in, and alignment checks can be both impressive and informative.
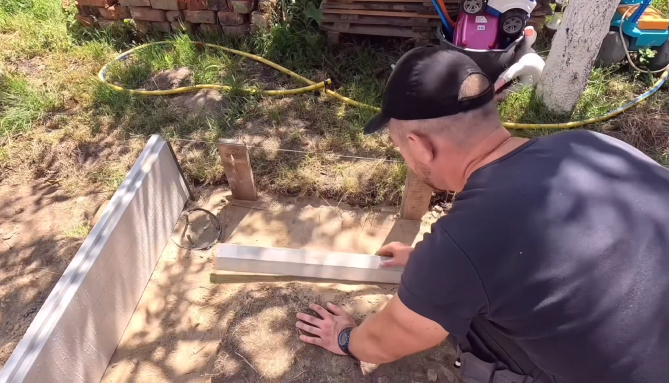
Stage 3: Formwork Installation
Formwork is the mold into which concrete will be poured. Properly built formwork ensures the strip foundation has the correct shape and dimensions.
- Formwork Construction: Using wooden planks or special panels, the team builds the form along the top of the piles, following the outline of the structure.
- Reinforcement Placement: Steel rebars are laid inside the formwork to strengthen the concrete once it’s poured.
Including time-lapse footage of formwork assembly adds interest to the video and helps viewers understand how everything lines up structurally.

Stage 4: Insulation with Penoplex
One of the modern improvements in foundation building is the use of Penoplex, a type of extruded polystyrene insulation. It improves energy efficiency and protects the foundation from temperature extremes.
- Installing Penoplex: Before pouring the concrete, Penoplex sheets are placed along the inner and outer sides of the formwork. Some builders also use it under the base of the strip to insulate against ground frost.
- Sealing Gaps: Special adhesives and foam are used to seal all joints, ensuring there are no cold bridges.
Highlighting the application of Penoplex is crucial in the video. It shows attention to long-term energy savings and modern building standards.
Stage 5: Pouring Concrete
With piles in place, formwork and reinforcement set up, and insulation installed, it’s time for the core of the foundation—the concrete.
- Mixing and Pouring: Concrete is mixed on-site or delivered by truck and poured into the formwork in sections, ensuring even distribution and no air pockets.
- Vibration and Leveling: A concrete vibrator helps settle the mix, and trowels are used to smooth the top.
- Curing: Concrete needs time to set and harden. Covering it with plastic helps retain moisture during the curing process.
In the video, this stage should be shown in real-time and time-lapse segments. Watching the transformation from empty formwork to a solid concrete base is very satisfying for viewers.
Stage 6: Formwork Removal and Final Touches
After curing, the formwork is removed to reveal the finished strip foundation.
- Removing the Forms: Carefully, the planks or panels are taken off, revealing clean concrete edges.
- Waterproofing and Backfilling: A waterproof membrane or coating may be applied, and the area around the foundation is backfilled with soil or gravel.
- Quality Check: Levels, alignments, and overall condition are inspected before continuing construction.
Video clips here can be slower-paced, offering a satisfying conclusion to the build. Narration can summarize what’s been done and explain next steps in the building process.
Advantages of Strip Foundation on Piles
Let’s pause to reflect on why this type of foundation is becoming increasingly popular, especially among DIY builders and private homeowners:
- Versatility: Works well in poor soil conditions thanks to the piles.
- Cost-Effective: Uses less concrete than a full slab and requires less excavation.
- Thermal Efficiency: When combined with Penoplex, it significantly reduces heat loss.
- Speed of Construction: With proper planning, all stages can be completed in just a few days.
- Eco-Friendly Option: Reduced ground disturbance and better insulation means lower environmental impact.
This summary can be presented in infographic-style overlays or voiceover in the final part of the video.

Bringing It All Together in One Video
Creating a full video of the entire foundation process from start to finish is not only helpful for documentation—it’s also a valuable educational tool for other builders and homeowners. To make the most out of the footage:
- Use Clear Captions for each stage.
- Add Time-Lapse and Real-Time Mix: Use real-time for critical steps like pouring, time-lapse for preparation.
- Voiceover or Subtitles: Explain the decisions, materials used, and tips.
- Highlight Mistakes to Avoid: Viewers learn as much from what goes wrong as what goes right.
- Include Drone Shots for overhead perspective of layout and progress.
Conclusion
A well-built foundation is the most crucial part of any structure. A strip foundation on piles, insulated with Penoplex, represents a modern, efficient, and durable choice for many homes. Documenting all stages in one video is a smart way to share knowledge, improve techniques, and inspire others to take on building projects with confidence.
Whether you’re a builder, a homeowner, or a video content creator, showcasing a foundation build from planning to completion offers insights, value, and visual appeal that can educate and impress. With every pile driven, every board nailed, and every layer of insulation placed, you’re building more than just a base—you’re building trust and quality that will last for decades.