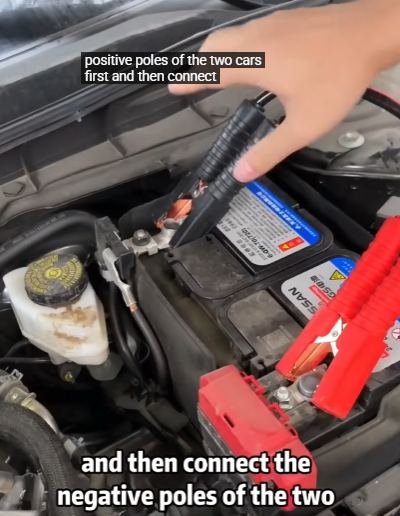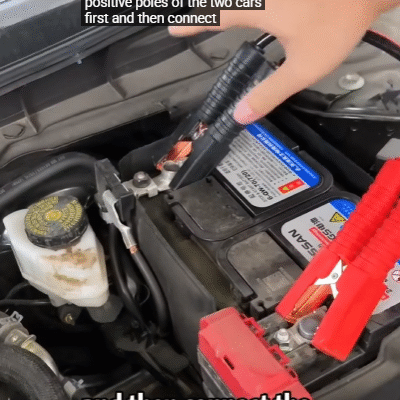
When it comes to cars, most people are comfortable turning the key, pressing the start button, or maybe even changing a tire. But when you start talking about car circuits—the wires, connectors, relays, and fuses that keep the vehicle running—99% of people quickly get lost. The truth is, modern cars are filled with complex electrical systems, and without a proper understanding of circuits, it’s nearly impossible to diagnose problems or add new features safely.
This article will break down the essentials of car circuits in simple terms, explain why they matter, and show how you can begin learning the basics. By the end, you’ll understand why most people avoid this subject and how you can be part of the 1% who actually knows how to handle it.
Why Car Circuits Matter
Cars are not just machines with engines anymore—they’re computers on wheels. Every function, from rolling down a window to powering the headlights or charging your phone, depends on circuits. A circuit is basically a closed loop that allows electricity to flow. If that loop is broken, the current won’t flow, and the component won’t work.
Think about it:
- The battery supplies power.
- Wires carry the electricity.
- Switches control when the electricity flows.
- Fuses protect the system from overload.
- Relays act like remote-controlled switches for high-power devices.
Together, these pieces form a network that makes your car reliable and safe. If one connection fails, the whole system can be affected. That’s why understanding circuits is so powerful—you can trace problems, fix them, and even customize your car without fear.

The Basic Building Blocks of Car Circuits
Before learning to connect circuits, you need to understand the main parts:
- Battery – The heart of the system, usually 12 volts in most cars. It stores energy and supplies it to all components.
- Alternator – Keeps the battery charged while the engine is running.
- Wires – Pathways for electricity, usually made of copper and coated with colored insulation.
- Fuse – A safety device that burns out if too much current flows, preventing damage.
- Relay – A small electronic switch that allows a low-power circuit to control a high-power circuit.
- Switch – Something you press, flip, or turn to let current flow (like headlights or ignition).
- Ground – The negative side of the circuit, usually connected to the car’s chassis.
These elements combine into circuits that power everything inside your vehicle.
Why 99% of People Don’t Know This
There are a few reasons why most people don’t understand car circuits:
- Fear of Electricity: Many people think working with car wiring is dangerous. In reality, a 12-volt system is much safer than household electricity, but it can still damage components if done incorrectly.
- Complexity of Modern Cars: Older vehicles had simple wiring. Today’s cars have computer modules, sensors, and miles of wiring. That can be intimidating.
- Lack of Education: Few schools teach automotive electrical systems outside of trade programs. Most car owners never learn.
- Trial and Error Can Be Expensive: Unlike changing a tire, making a mistake with circuits can blow a fuse, ruin a module, or even start a fire.
Because of these reasons, people stick to mechanical maintenance and avoid electrical work, leaving it to professionals.

How to Connect a Basic Car Circuit
Let’s imagine you want to install a new set of LED lights on your car. Here’s a step-by-step approach:
- Plan the Circuit
Draw a simple diagram. Decide where the power will come from (battery), where the switch will be, and where the lights will be grounded. - Gather Materials
- Wires (red for positive, black for ground is common)
- Fuse holder and correct fuse
- Switch
- Relay (if lights draw a lot of current)
- Connectors and electrical tape
- Connect the Power Source
Start from the positive terminal of the battery. Install an inline fuse close to the battery to protect the circuit. - Wire to the Relay
Use the fuse-protected wire to connect to the relay. The relay will control the flow of electricity to the lights. - Install the Switch
Connect a smaller wire from the switch to the relay’s control terminal. This way, the switch only activates the relay instead of carrying all the current. - Connect the Lights
Wire the output side of the relay to your lights. Then ground the lights to a clean metal surface on the car’s chassis. - Test the Circuit
Turn the switch on. The relay should click, and your lights should shine. If they don’t, check the fuse, ground connection, and wiring.
This is a simple example, but the principles apply to nearly any car circuit.
Safety Tips
When working with car circuits, always keep these safety rules in mind:
- Disconnect the battery before doing major wiring work.
- Use the correct fuse size—never replace a 10A fuse with a 30A one.
- Avoid messy wiring—use cable ties and keep wires away from hot engine parts.
- Check grounds carefully—a bad ground is one of the most common causes of electrical problems.
- Test with a multimeter—don’t just guess where the current flows.

Signs of a Bad Circuit
If your car is showing electrical issues, it may be due to a poor connection. Watch for these signs:
- Lights flickering or dimming
- Fuses blowing repeatedly
- Accessories not powering on
- Burning smell from wires
- Battery draining quickly
In these cases, tracing the circuit with a diagram and multimeter is the best way to locate the fault.
Why Learning Circuits Gives You Power
Once you understand car circuits, a whole world of possibilities opens up:
- Adding Accessories: Want a dash cam, backup camera, or extra lights? You can install them yourself.
- Troubleshooting: No more paying hundreds for a mechanic to find a loose ground wire.
- Emergency Repairs: If your car dies at night because of a blown fuse, you’ll know what to do.
- Customization: Modify your car safely without relying on unreliable “hack jobs.”
In fact, this knowledge saves money and increases confidence. Mechanics and auto electricians charge high rates because they’re part of the 1% who understand these systems. You can join them with some study and practice.

How to Start Learning
You don’t need to be an engineer to connect car circuits. Here’s how to begin:
- Get a Wiring Diagram: Look up the wiring diagram for your vehicle. It’s like a map that shows how everything connects.
- Buy a Multimeter: This simple tool lets you measure voltage, resistance, and continuity. It’s your best friend for electrical work.
- Practice on Small Projects: Try wiring a car phone charger or LED strip. Start simple before attempting big repairs.
- Study Online Resources: YouTube channels, forums, and guides can teach you step by step.
- Stay Safe and Patient: Work slowly, double-check connections, and learn from mistakes.
Conclusion
It’s true: 99% of people don’t know how to connect car circuits. The world of automotive electricity seems complicated and intimidating at first, but once you understand the basics—battery, fuse, relay, switch, ground—it starts to make sense. Connecting circuits isn’t about guesswork; it’s about following a logical path and ensuring the flow of current is safe and controlled.
Whether you’re fixing a broken headlight, installing a new stereo, or adding off-road lights, knowing how to work with circuits puts you in control. You’ll save money, avoid frustration, and gain a valuable skill that most car owners lack.
The best part? With practice, you’ll realize car circuits aren’t mysterious at all—they’re just puzzles waiting to be solved.


