
The check engine light is one of the most frustrating warning signals for any car owner. It suddenly glows on your dashboard, and your first thought is often: “Is my car about to break down?” In reality, the check engine light, also called the malfunction indicator lamp (MIL), can mean many different things—from something as simple as a loose gas cap to more serious issues like a failing catalytic converter.
If you’ve ever wondered how to remove or reset the car engine check light, this guide will walk you through the steps while also explaining when it’s safe to do so and when you should head straight to a mechanic.
What Does the Check Engine Light Mean?
Before rushing to remove or reset the light, it’s important to understand what it represents. Your car’s onboard diagnostics system (OBD-II) constantly monitors engine performance, emissions, and other critical systems. When something unusual is detected, the system stores a trouble code and activates the check engine light.
Common causes include:
- Loose or faulty gas cap
- Oxygen sensor failure
- Spark plug or ignition coil problems
- Mass airflow sensor malfunction
- Catalytic converter issues
- Exhaust gas recirculation (EGR) valve failure
Some problems are minor and don’t affect driving immediately, but others can damage your engine if ignored.
Should You Remove the Check Engine Light?
The real question isn’t just how to remove it, but whether you should. The light is not simply an annoyance—it’s a warning. Resetting the light without fixing the problem can hide serious issues and may even make repairs more costly later on.
That said, there are legitimate times when you may want to reset it:
- After fixing the underlying issue
- To check if the light was triggered by a temporary glitch
- When testing or troubleshooting sensors and parts
Methods to Remove the Car Engine Check Light
Here are the most effective and safe ways to remove or reset the check engine light.
1. Check and Tighten the Gas Cap
Believe it or not, a loose gas cap is one of the most common reasons the check engine light turns on. If the cap is not sealed properly, fuel vapors escape, triggering the emissions system.
Steps:
- Park your car and turn off the engine.
- Open the fuel door and tighten the gas cap until it clicks.
- Restart the engine and drive for a few miles.
If the light was caused by the gas cap, it should turn off within a day or two.
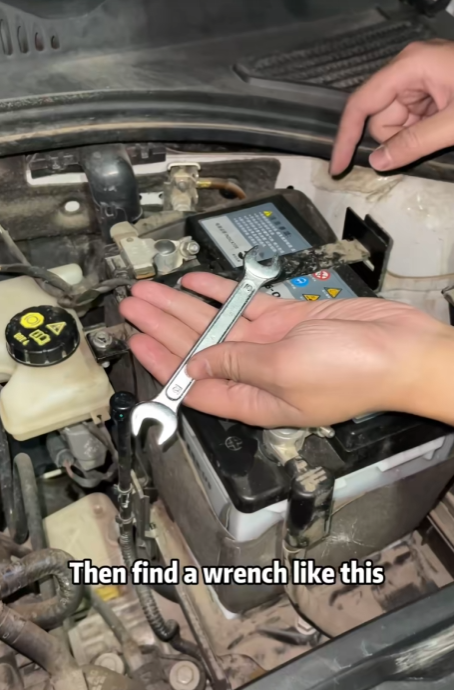
2. Disconnect the Car Battery
One of the oldest tricks to reset the engine light is to disconnect the car’s battery. This cuts off power to the car’s computer, clearing stored error codes.
Steps:
- Turn off the ignition.
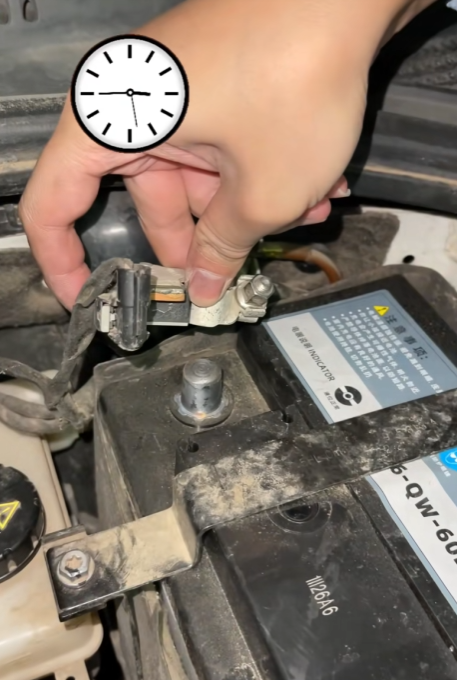
- Open the hood and disconnect the negative (-) battery cable using a wrench.
- Wait at least 15 minutes (some recommend 30 minutes).
- Reconnect the cable and tighten it securely.
- Start the car and check if the light is gone.
⚠️ Keep in mind: This method may also reset your radio presets, clock, and other settings.
3. Use an OBD-II Scanner
The most accurate way to remove the check engine light is by using an OBD-II scanner. These devices can be purchased online or borrowed from auto parts stores.
Steps:
- Plug the scanner into the OBD-II port (usually under the dashboard, near the steering wheel).
- Turn on the ignition without starting the engine.
- Let the scanner read the diagnostic trouble codes (DTCs).
- Write down or save the codes for reference.
- Select the option to clear/reset codes.
Once cleared, the light should disappear immediately. However, if the problem hasn’t been fixed, it will likely come back.
4. Drive and Let the System Reset Itself
Sometimes the check engine light comes on due to a minor temporary issue, like a small change in air-fuel mixture. If that’s the case, the computer may reset itself after a few driving cycles.
Steps:
- Drive normally for about 50–100 miles over several trips.
- If the issue was temporary, the light may turn off automatically.
This method is safe, but if the light stays on for more than a week, you should investigate further.
5. Seek Professional Help
If the check engine light is blinking (not steady), this usually indicates a serious misfire that could damage the catalytic converter. In such cases, you should not try to simply remove the light. Take the car to a mechanic immediately.

Common Mistakes When Removing the Check Engine Light
- Ignoring the real problem: Resetting without fixing may cause further damage.
- Using cheap scanners incorrectly: Some budget tools can clear codes but not identify all of them.
- Disconnecting the battery too often: Constant resets without diagnosis can mask persistent problems.
Tips for Preventing the Check Engine Light
- Maintain your car regularly – Replace spark plugs, filters, and fluids on time.
- Check your gas cap – Make sure it seals tightly after every refuel.
- Use quality fuel – Poor-quality gasoline can trigger sensors.
- Inspect oxygen sensors – Replace them when faulty to prevent engine inefficiency.
- Service the catalytic converter – Avoid long-term engine misfires that may damage it.

Final Thoughts
The check engine light is not something you should ignore, but it’s also not always a reason to panic. Removing or resetting the light can be done easily by tightening the gas cap, disconnecting the battery, using an OBD-II scanner, or simply driving and letting the system reset itself.
However, the most important takeaway is this: resetting the check engine light should come after diagnosing and fixing the problem, not as a shortcut to avoid repairs.
By understanding what the light means and how to properly address it, you can keep your car running smoothly, save money on repairs, and avoid stressful breakdowns.