If you’ve ever watched a gymnast, a dancer, or even a skilled yoga practitioner seamlessly transition from a cartwheel into a handstand, you might think, “Wow, that looks effortless!” But let me tell you—getting there takes practice, patience, and a whole lot of flexibility. And yes, it took me quite a few tries!
I have always admired people who could perform gravity-defying moves with grace and control. The cartwheel into a handstand is one of those transitions that look so smooth when done right but require strength, technique, and mobility. So, I decided to challenge myself to master it.


Step 1: Understanding the Basics
Before jumping straight into the transition, I made sure I had a solid foundation in both cartwheels and handstands separately. These are two distinct movements that require different skill sets.
Cartwheel: This is a dynamic lateral movement where you shift your weight from one hand to the other while keeping your legs straight and extended in the air. A strong cartwheel is essential to build momentum for the handstand.
Handstand: This requires balance, core engagement, and upper body strength. Unlike a cartwheel, where your body moves laterally, a handstand demands that you stabilize yourself in a vertical position.
Since I was already comfortable with both individually, the next challenge was linking them together fluidly.

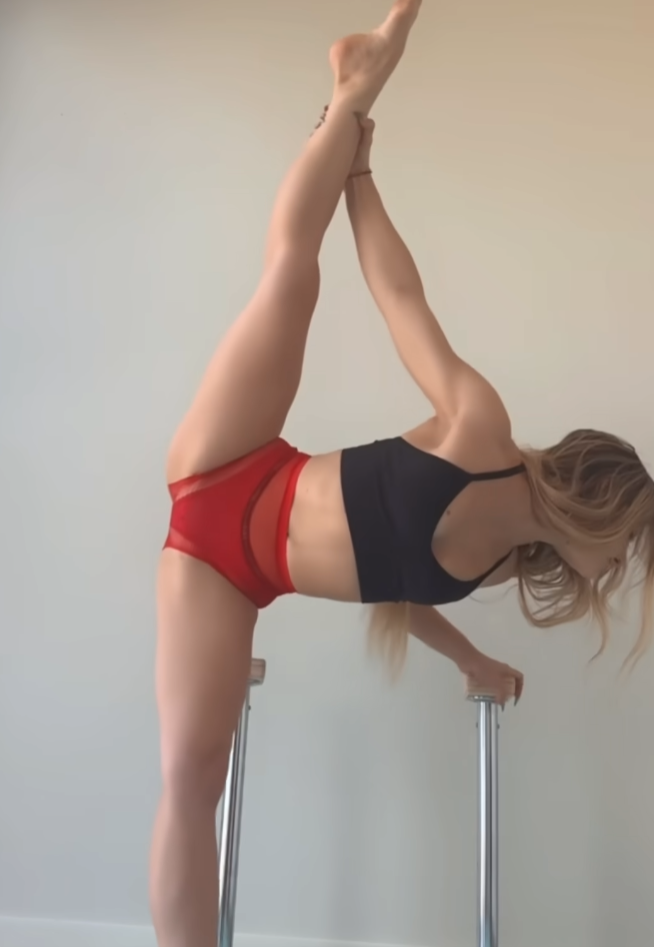
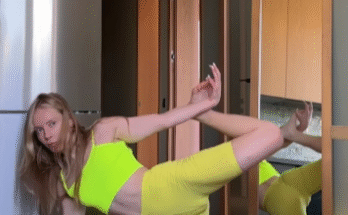
Step 2: Increasing Flexibility
Flexibility is a game-changer for executing this transition smoothly. I focused on improving my range of motion in my legs, shoulders, and back. Here are some of the stretches I incorporated into my routine:
- Hamstring stretches (seated forward bends, standing toe touches) to keep my legs straight and extended effortlessly.
- Hip openers (lunges, butterfly stretch) to help with the cartwheel’s wide-legged motion.
- Shoulder mobility drills (arm circles, wall angels) to improve overhead flexibility for the handstand.
- Backbends and bridges to increase overall spinal flexibility.
Step 3: Drilling the Technique
Once I was confident in my flexibility, I began breaking down the transition into smaller drills:
- Slow-motion cartwheels – Instead of rushing through the movement, I practiced controlled cartwheels, pausing slightly when my legs were in the air.
- Tuck handstands – I worked on controlled entries into a handstand, holding the balance for as long as possible.
- Kick-up transitions – Starting from a cartwheel, I practiced pausing mid-air and attempting to shift into a handstand.
- Wall-assisted handstand holds – This helped me get comfortable staying upside down.
Step 4: The Struggle is Real!
No one talks about how challenging it can be to link two movements seamlessly! My first attempts were anything but graceful. Either I didn’t generate enough power from my cartwheel to transition into the handstand, or I lost my balance midway.
One of the biggest mistakes I made was keeping my arms too relaxed. If your arms aren’t fully engaged, you won’t have the support needed to hold a solid handstand. Another issue was my leg positioning—sometimes my legs flailed too much, making it impossible to find a stable handstand position.
To overcome these struggles, I focused on:
- Engaging my shoulders and locking my arms.
- Keeping my core tight to prevent unnecessary wobbling.
- Finding the right amount of momentum—not too much to overbalance, but not too little to fall short.
Step 5: The Breakthrough Moment
After several frustrating attempts, something clicked. I found the sweet spot where my cartwheel had just enough power to push into a handstand without over-rotating.
The moment I finally held my handstand after transitioning from a cartwheel, I felt a rush of excitement! It wasn’t perfect yet, but it was a start. With each repetition, my balance improved, and I could hold the position longer.
Step 6: Refining the Skill
Now that I could perform the move, my next goal was refining it to make it look effortless. I focused on:
- Pointing my toes to maintain clean lines.
- Holding my handstand longer to show control.
- Practicing on different surfaces (grass, mats, hardwood) to adapt to various environments.
- Filming my progress to analyze what needed improvement.
Lessons Learned
- Consistency is key – Improvement didn’t happen overnight. Daily practice made a huge difference.
- Mind-body connection matters – Understanding how each muscle engages helps in executing the move better.
- Mistakes are part of the process – Every failed attempt taught me something valuable.
- Flexibility is just as important as strength – Being flexible made the movement smoother and more controlled.
Conclusion: You Can Do It Too!
If you’re thinking about trying this move, go for it! Start with the basics, work on your flexibility, and take it one step at a time. It might take a few tries (or a hundred), but every attempt brings you closer to mastering it.
The cartwheel into a handstand is a beautiful move that combines strength, grace, and control. And trust me, once you get it, the feeling of accomplishment is worth all the effort! So keep practicing, stay patient, and enjoy the journey of movement and flexibility.