✨ ✔️ Do each stroke 15–20 times ✔️ Go slower than in the video for best results ✔️ And don’t forget to repeat on the other side! Make this a calming self-care ritual and feel your face transform, stroke by stroke. 🌿😊
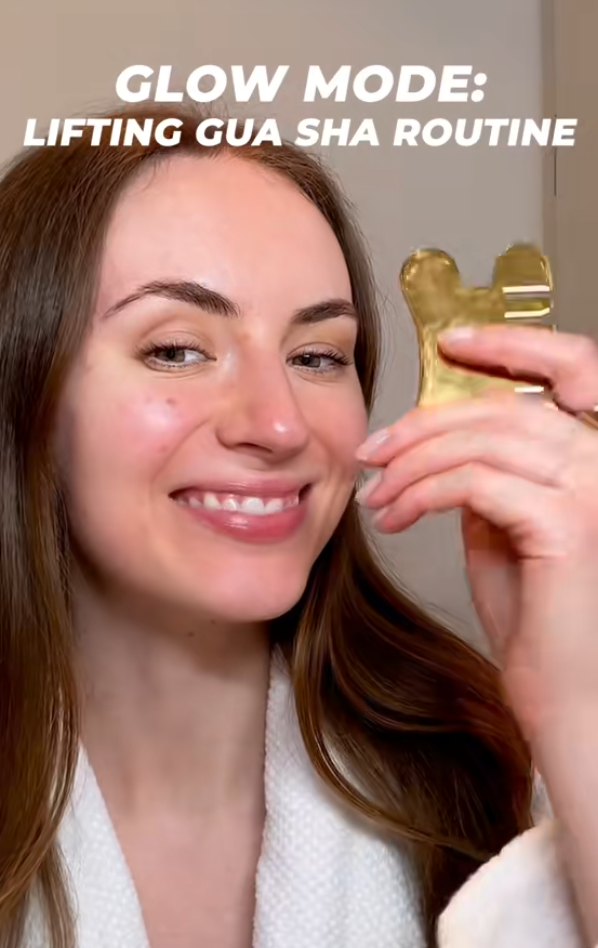
🌟✨ Full #GuaSha Routine – Follow Along! ✨🌟
Ready for a full-face sculpt and glow? This routine is designed to release tension, boost #circulation, and promote deep #lymphaticdrainage for a lifted, radiant look. 💆♀️✨
Gua Sha, an ancient Chinese healing technique, has taken the beauty and wellness world by storm—and for good reason! When done consistently, this practice can help depuff, contour, and revitalize your complexion. Follow this step-by-step guide to create a calming self-care ritual that leaves your skin glowing from within.
✨ Why Gua Sha? Benefits You’ll Love
Before diving into the routine, let’s talk about why Gua Sha is worth adding to your skincare regimen:
✔️ Boosts Circulation – Encourages blood flow for a healthy, rosy glow.
✔️ Reduces Puffiness – Drains excess fluid for a more sculpted look.
✔️ Relieves Tension – Softens frown lines and jaw tension from stress or clenching.
✔️ Stimulates Lymphatic Drainage – Helps detoxify and reduce under-eye bags.
✔️ Promotes Collagen Production – Gentle pressure supports skin elasticity over time.
For best results, use a Gua Sha tool made of jade, rose quartz, or stainless steel, and always apply with a facial oil or serum to reduce friction.
🌿 Your Step-by-Step Gua Sha Routine
✔️ Do each stroke 15–20 times
✔️ Go slower than you think—gentle pressure is key!
✔️ Don’t forget to repeat on the other side!
Step 1: Prep Your Skin
Start with a clean face and apply a few drops of your favorite facial oil (like jojoba, rosehip, or squalane). This ensures smooth gliding and prevents tugging.
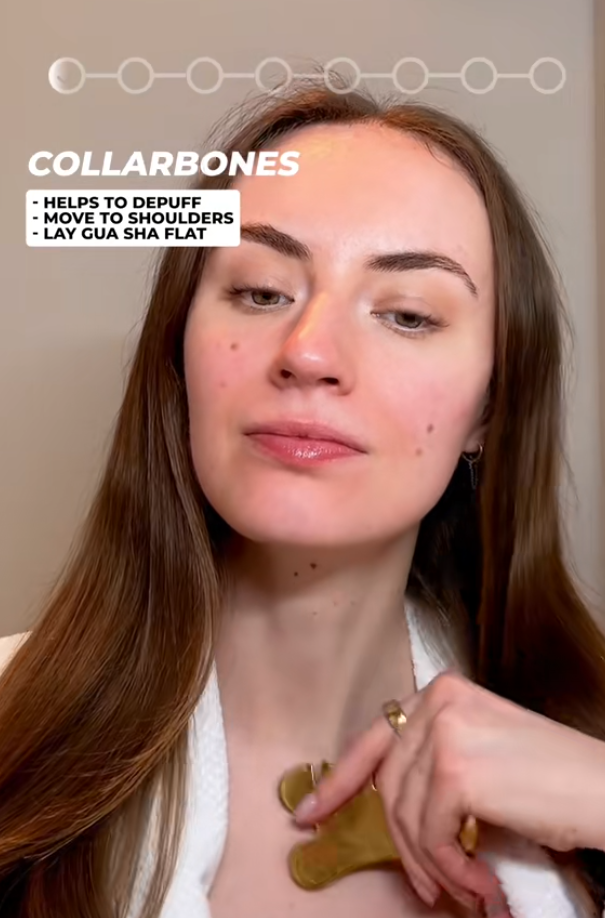
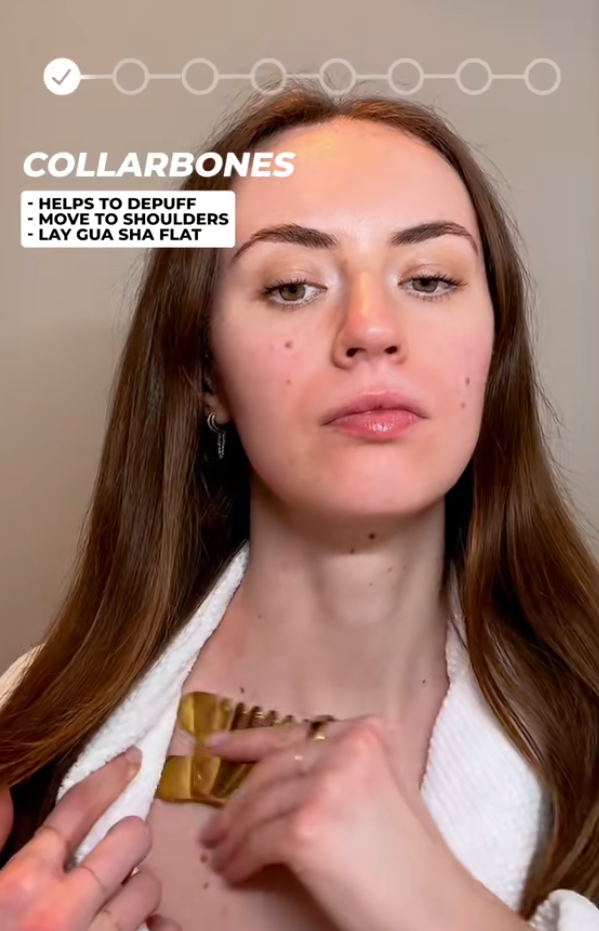
Step 2: Neck & Décolletage (Lymphatic Activation)
- Under the Chin to Ear: Glide the curved side of your tool from the center of your chin outward toward your earlobes.
- Down the Neck: Sweep downward along the sides of your neck toward your collarbones to encourage lymphatic drainage.
💡 Why? This helps release toxins and reduces puffiness before working on the face.
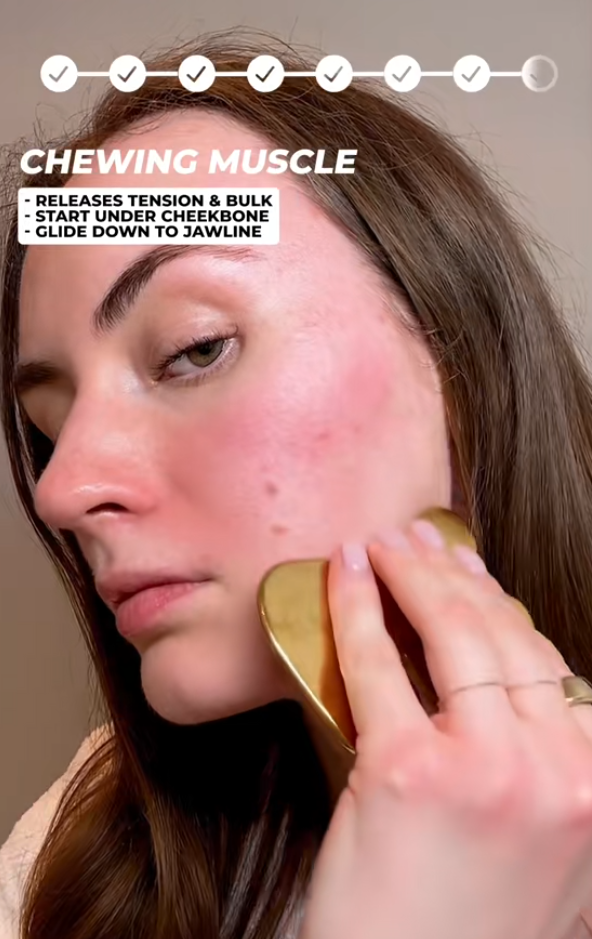
Step 3: Jawline & Chin (Sculpting & Tension Release)
- Jawline Definition: Place the tool at your chin and glide up along your jawbone toward your ear.
- Under the Chin: Use short upward strokes from the center outward to define your jaw.
💡 Tip: If you hold tension in your jaw, spend extra time here to release tightness.
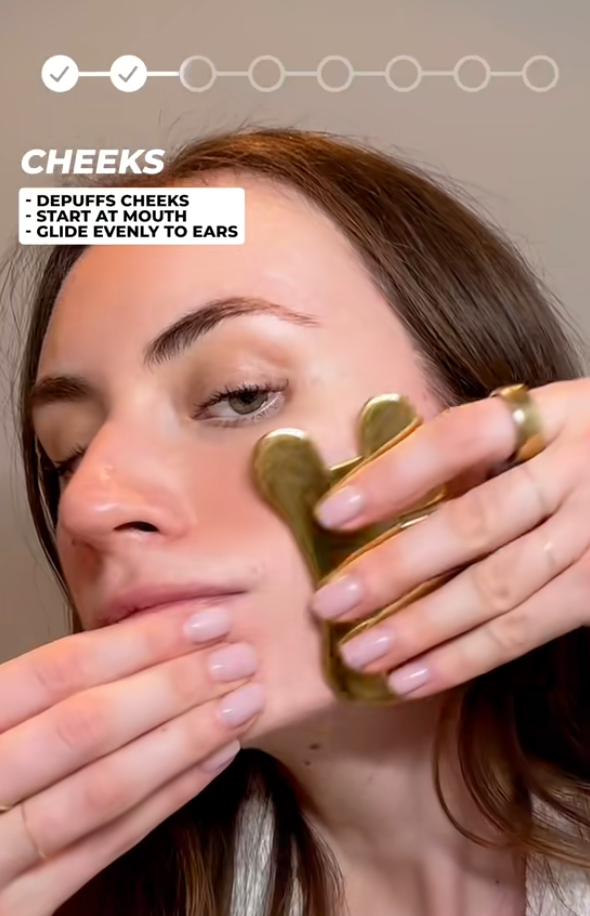
Step 4: Cheeks (Lifting & Contouring)
- Apple of Cheek to Ear: Start near your nose and sweep outward toward your hairline.
- Under Cheekbone: Glide from the corners of your mouth up toward your temples for a lifted effect.
💡 Pro Move: Angle the tool slightly upward to mimic a “natural facelift.”
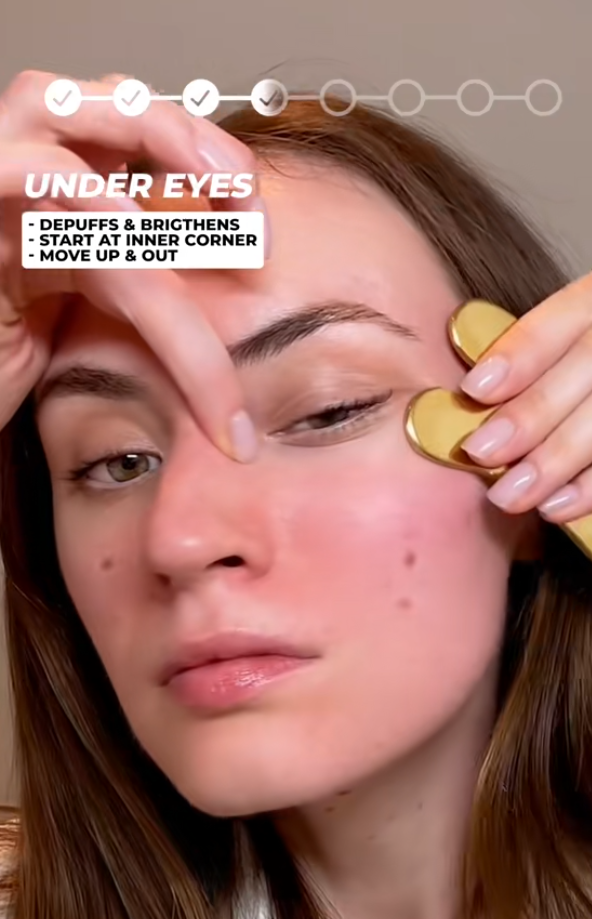
Step 5: Under-Eyes (Depuffing & Brightening)
- Inner to Outer Eye: Gently sweep from the inner corner of your eye toward your temples. Use the smaller curved edge for precision.
💡 Be Extra Gentle: The under-eye area is delicate—no tugging!
Step 6: Brow & Forehead (Smoothing & Relaxation)
- Between Brows: Glide upward from the center of your brows toward your hairline.
- Horizontal Strokes: Sweep sideways across your forehead to ease tension lines.
💡 Bonus: This can help relieve headaches caused by stress!
Step 7: Eyebrows & Finish (Tension Relief & Glow)
- Along Brow Bone: Trace the arch of your brows from the inner to outer edge.
- Final Lymphatic Drainage: Gently press along your lymph nodes (behind ears, under jaw) to flush out toxins.
🌟 Make It a Ritual
Gua Sha isn’t just about physical benefits—it’s a moment of mindfulness. Try:
🌿 Playing calming music
🕯️ Lighting a candle
💆♀️ Taking deep breaths with each stroke
Consistency is key! Aim for 3–5 times a week to see lasting results.
✨ Final Tips for Best Results
✔️ Always use light to medium pressure – Too much force can cause irritation.
✔️ Clean your tool after each use – Prevent bacteria buildup with soap and water.
✔️ Store in a cool, dry place – Protect your jade or rose quartz from heat.
✔️ Stay hydrated – Lymphatic drainage works best when you’re well-hydrated!
😊 Your Glow Awaits!
By following this routine, you’re not just sculpting your face—you’re giving yourself the gift of relaxation and radiant skin. Which step feels the best for you? Let me know in the comments!
💖 Save this guide and follow for more self-care tips! #SelfCareSunday #NaturalGlow #SkincareRoutine