Whether you’re renovating your home, working on a craft project, or simply fixing up a small crack in the wall, one question often pops up: How do I fill the seams? It might sound like a simple task, but knowing how to properly fill seams can make the difference between a professional-looking finish and a sloppy job. In this article, we’ll walk you through everything you need to know—step by step—to master the art of seam filling.
What Are Seams, and Why Do They Matter?
Seams are the lines or gaps where two surfaces meet—like the edge of drywall panels, joints in wood flooring, tile gaps, or even fabric in upholstery. Over time, seams can crack, shift, or become visible due to wear and tear, temperature changes, or improper installation.
Filling seams isn’t just about looks—it’s also essential for structural stability, weatherproofing, and preventing moisture damage or pest entry. A clean, smooth seam can enhance the appearance of a room and make your renovation look seamless—literally.
Tools and Materials You Might Need
Before you start filling any seams, you’ll want to gather the right tools and materials. Depending on the type of surface you’re working with, you may need:
- Putty knife or taping knife
- Joint compound or drywall mud
- Caulk (latex or silicone)
- Sandpaper or sanding block
- Seam tape or mesh tape
- Primer and paint
- Cleaning cloths
- Utility knife
- Painter’s tape
For wood projects, you might also need wood filler or wood putty. For tiles, a high-quality grout will be required.
Step-by-Step Guide to Filling Seams
Let’s break down the process based on common surfaces: drywall, wood, and tile.
1. Filling Drywall Seams
Drywall seams are one of the most common types that homeowners deal with. Here’s how to fill them:
Step 1: Prepare the Surface
Make sure the drywall is clean and dry. Use a utility knife to remove any loose material or old tape.
Step 2: Apply Seam Tape
Apply drywall tape (paper or mesh) over the seam. Mesh tape is self-adhesive and easier for beginners.
Step 3: Apply Joint Compound
Using a taping knife, spread joint compound (mud) over the seam and tape. Feather the edges to blend it into the wall.
Step 4: Let It Dry and Sand
Let the compound dry completely (usually 24 hours), then sand it smooth. Repeat with 1–2 more thin layers, sanding between each.
Step 5: Prime and Paint
Once the seam is smooth and invisible, apply primer and paint to match the wall.
2. Filling Seams in Wood
Wood seams may appear in baseboards, crown molding, paneling, or furniture. Here’s how to deal with them:
Step 1: Clean the Gap
Use a brush or cloth to remove dust and debris from the seam.
Step 2: Choose the Right Filler
For painted wood, use wood filler or caulk. For stained wood, use a stainable wood putty that matches the finish.
Step 3: Apply the Filler
Use a putty knife to press the filler into the seam. Smooth the surface and remove any excess.
Step 4: Let It Dry and Sand
Let the filler dry according to the instructions. Then lightly sand it until it’s flush with the surface.
Step 5: Finish It Off
Paint or stain to match the surrounding wood.
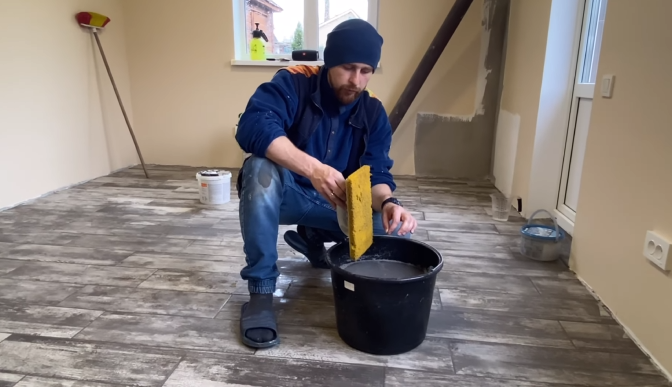
3. Filling Seams in Tile Work
Tile seams are filled with grout or sometimes caulk, especially where flexibility is needed (like in corners).
Step 1: Clean the Seam
Use a grout saw or tool to remove old or cracked grout. Clean out the seam thoroughly.
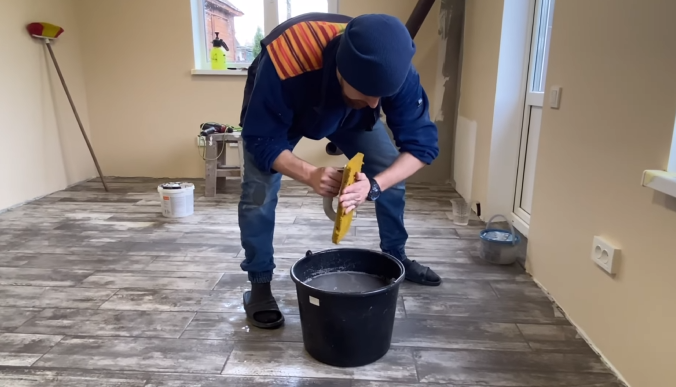
Step 2: Mix the Grout
Mix grout to a peanut-butter consistency. If you’re using caulk, make sure it’s made for tile or bathrooms.
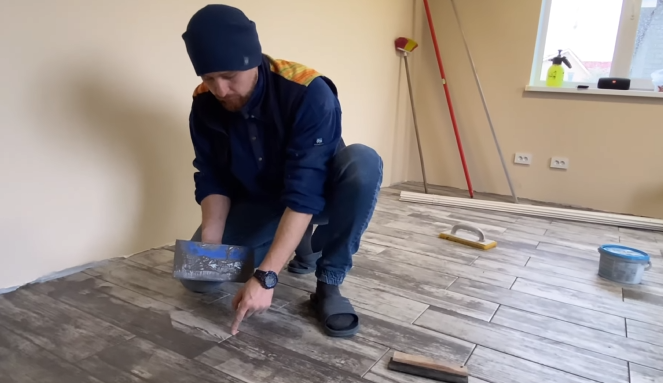
Step 3: Fill the Gap
Use a rubber grout float to press grout into the seams. For caulk, apply a smooth bead using a caulk gun.
Step 4: Wipe and Shape
Wipe excess grout off tiles with a damp sponge. Shape caulk lines with a wet finger or finishing tool.
Step 5: Let It Cure
Allow the grout or caulk to cure fully before exposing it to water or pressure.
Tips for a Seamless Finish
- Work slowly and patiently—rushing the process often leads to lumps, gaps, or cracks.
- Use thin layers of filler and build them up gradually.
- Match colors carefully, especially for visible seams in wood or tile.
- Don’t skip sanding—this is what gives you that ultra-smooth finish.
- Use painter’s tape to protect adjacent surfaces and get crisp lines.
- Practice makes perfect—don’t be discouraged if your first attempt isn’t flawless.
Common Mistakes to Avoid
- Overfilling the seam, leading to bulky or uneven surfaces.
- Underfilling, which can result in cracks forming later.
- Using the wrong filler for the material—always match product to surface.
- Not letting each layer dry fully, which weakens the final finish.
- Neglecting to clean the seam before filling, reducing adhesion.

When to Call a Professional
While many seam-filling jobs are simple DIY tasks, sometimes it’s best to call in a pro—especially if:
- The damage is structural or extensive.
- Moisture or mold is present.
- You’re dealing with expensive materials like marble or hardwood.
- Time is tight and you want a guaranteed clean finish.
Final Thoughts
Filling seams might seem like a small detail, but it’s one of the most satisfying parts of any project. It’s that final step that pulls everything together, making your walls, woodwork, or tiling look polished and professional. With the right tools, patience, and attention to detail, you’ll be amazed at what you can accomplish.
So next time you’re faced with a crack, a gap, or an uneven joint, don’t panic—just remember the simple question: How to fill the seams??? Now you know the answer.