
There’s nothing more frustrating than seeing your car’s trouble light—often the check engine light—pop on without warning. It can trigger panic, confusion, and worry about costly repairs. But before rushing to the mechanic or emptying your wallet, there are several smart, zero-cost ways you can attempt to eliminate the trouble light on your own.
In many cases, the light might not mean a serious issue. It could be a simple fix you can handle without special tools or mechanical knowledge. Here’s how to troubleshoot and potentially eliminate your car’s warning light—for free.
1. Understand What the Trouble Light Means
First, it’s essential to know that the “trouble light” or check engine light is part of your car’s onboard diagnostics system (OBD). When the car’s computer detects a problem with the engine, emissions, or other major systems, it activates the light to alert you.
This doesn’t always mean a major issue. Sometimes, it’s something minor, like a loose gas cap or a temporary sensor error.

2. Check the Gas Cap – The #1 Free Fix
Yes, it might sound too easy, but a loose or faulty gas cap is one of the most common reasons the check engine light comes on. When the gas cap isn’t sealed properly, it allows fuel vapors to leak, triggering the emissions system alert.
What to do:
- Turn off your car.
- Open the fuel door and tighten the gas cap until you hear several clicks.
- Restart your engine.
- Drive for a few miles. If the cap was the issue, the light should turn off within a day or two.
If the cap is damaged or cracked, you may need a replacement eventually—but this first check costs you nothing.
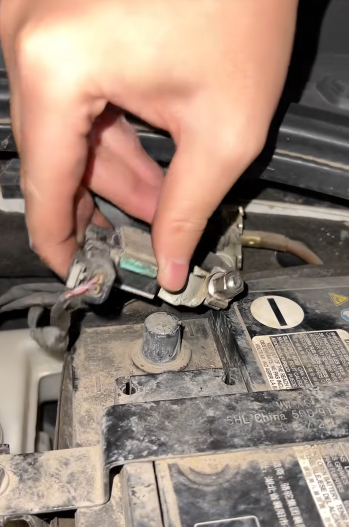
3. Disconnect the Battery to Reset the System
If the car isn’t showing any performance issues and you’ve confirmed the gas cap is fine, the warning light may be from a past event that the car’s computer hasn’t cleared yet. Resetting the system can help.
Here’s how:
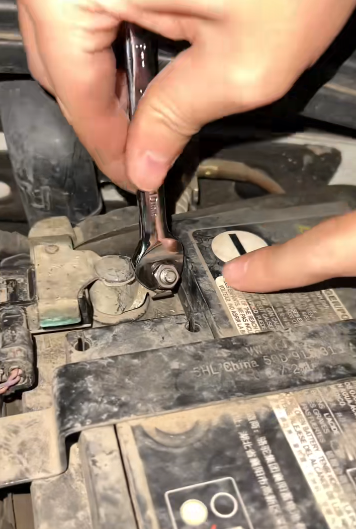
- Use a wrench to disconnect the negative terminal of your car battery.
- Wait 10 to 15 minutes. This gives the system time to reset.
- Reconnect the terminal and tighten it securely.
- Start your engine.
Sometimes, this simple reset clears the light—especially if the problem was momentary or already fixed.
Warning: Only try this if you’re comfortable handling the battery. Be cautious not to let tools touch both terminals, and avoid resetting if the car has significant performance issues.
4. Use a Free OBD-II Scanner at Auto Parts Stores
Most auto parts stores (like AutoZone, O’Reilly, and Advance Auto Parts) offer free diagnostic checks using an OBD-II scanner. This device plugs into your car’s port (usually under the dashboard) and reads the code causing the trouble light.
Benefits of doing this:
- It’s completely free—no obligation to buy anything.
- You’ll get a specific code (like P0455 or P0301), which tells you what system is affected.
- You can research the code online or ask the store employee for details.
Sometimes, the issue is minor, like a sensor glitch or a loose wire. If so, clearing the code with the scanner can turn the light off—again, without any cost to you.
5. Let the System Recheck Itself
Modern cars often monitor systems constantly and will sometimes clear a minor problem on their own. If the trouble light came on while driving in harsh weather, after refueling, or due to temporary electrical fluctuations, it might turn off automatically after a few driving cycles.
What you can do:
- Drive normally for a few days.
- Avoid aggressive driving or high engine loads.
- Observe if the car drives smoothly and efficiently.
If the light disappears, you likely experienced a one-time issue. Still, keep an eye out in case it reappears later.
6. Check for Common User Mistakes
Before assuming the worst, consider these zero-cost checks:
- Did you recently change the oil and forget to reset the light? Some dashboard lights remain on until you manually reset them (consult your owner’s manual for steps).
- Did a sensor wire get bumped or disconnected? Look under the hood for any loose cables near the battery, air filter, or engine sensors.
- Did you jumpstart another car or replace the battery? Electrical surges can sometimes cause warning lights to flash temporarily.
Fixing these small oversights may solve the issue instantly.
7. Try the “Drive Cycle” Method
If your car needs to verify a repair before clearing the warning light, a “drive cycle” can help. This is a specific set of driving conditions that allows the car’s computer to test emissions systems.
Basic drive cycle example:
- Start with a cold engine (parked overnight).
- Let the car idle for 2-3 minutes.
- Accelerate gently to 55 mph and cruise steadily for 5 minutes.
- Decelerate and idle again.
- Repeat this process a few times over a few days.
Often, after a successful drive cycle, your system will automatically turn off the light if the issue is no longer present.

8. Be Cautious of DIY Fixes
While it’s great to save money, be cautious about some “hacks” online that suggest taping over the warning light, unplugging sensors, or using apps to permanently disable alerts. These methods can be dangerous, damage your car, and may make you miss serious engine problems.
Stick to safe, no-cost solutions you can reverse if needed.
Final Thoughts
While the check engine or trouble light can be alarming, don’t panic. You don’t always need to spend money to resolve the issue. In fact, many drivers have eliminated the light simply by tightening the gas cap, resetting the battery, or letting the system correct itself.
Start with these free steps before visiting a mechanic. If the light stays on or your car drives strangely, you’ll want to investigate further—but at least you’ll have narrowed down the issue and possibly saved yourself time and money.
Remember: A well-informed car owner is a powerful one. Stay calm, stay curious, and don’t spend a penny until you’ve tried these smart, no-cost solutions.